Home Improvement

How Homeowners Can Make the Most of Their Yards-Even in Winter

  • By
  • Posted

After almost two years of pandemic life, homeowners understand the significant value of having a yard. Here are 8 ideas for getting creative with outdoor space.

©Trevor Tinker - Getty Images

by Barbara Ballinger

Spending time outdoors at the height of the pandemic was a way to get fresh air, exercise safely, and expand living quarters. Now, nearing two years later, an outdoor retreat has become even more sought after, causing homeowners and design professionals to get creative in maximizing square footage.

Whether homeowners have a big suburban yard, rural acreage, or a small urban balcony, there are multiple ways to take advantage of the space, even in winter. They can pile on layers or follow the Swedish mantra of Friluftsliv, which translates to “open-air living and the value of spending time in remote locations for spiritual and physical well-being.”

The key isn’t the size of their space, or which activities homeowners do, but taking advantage of Mother Nature’s gifts—air, sky, clouds, sun, and greenery.

Millennials and other new homeowners have become particularly adept at using their yards for almost everything—from camping out with a tent and fire pit to organizing a staycation, or setting up an alternative office when they need a break from their indoor space, says Kris Kiser, president and CEO of TurfMutt Foundation, the education arm of the Alexandria, Va.-based Outdoor Power Equipment Institute, which encourage enjoyment of nature.

Kiser says there’s even a new term for this trend, which doesn’t need translation: Backyarding!

©AleksandarNakic - Getty Images

Here are eight ideas to help make the right investments in furnishings, landscaping, appliances, and more for your yard.

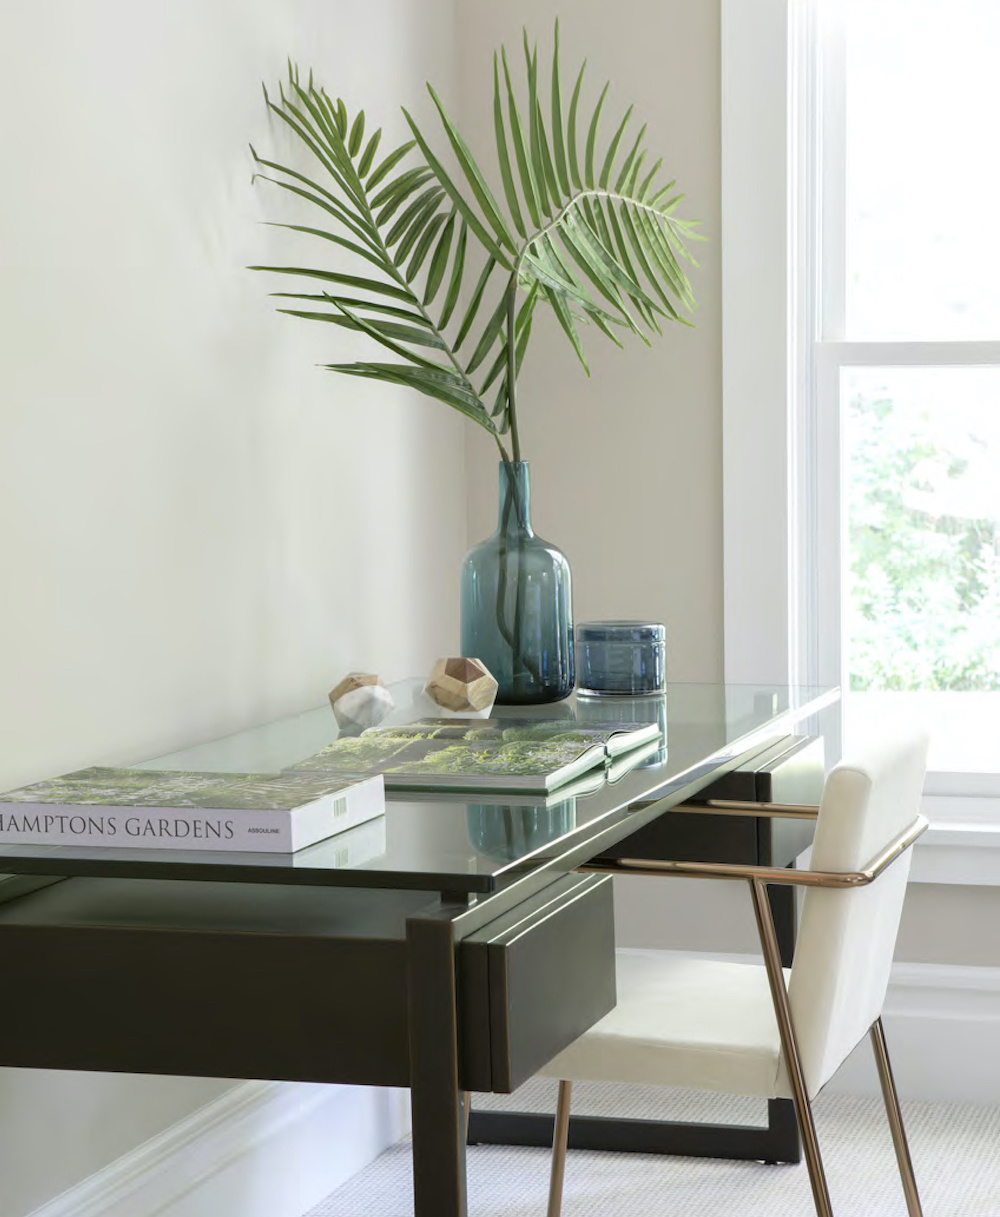
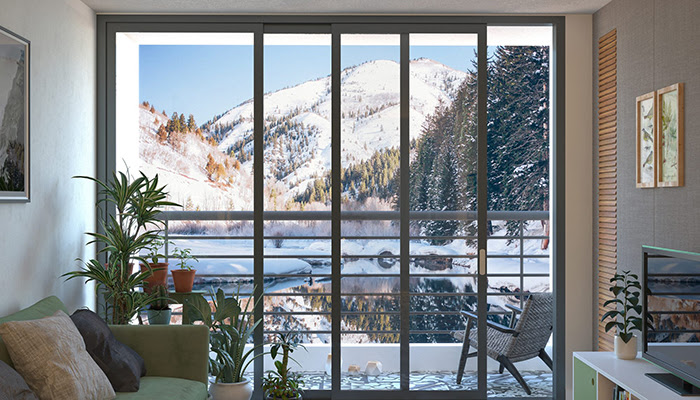
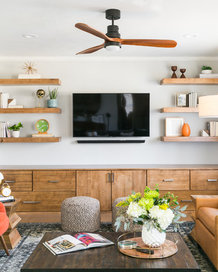
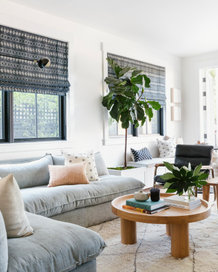
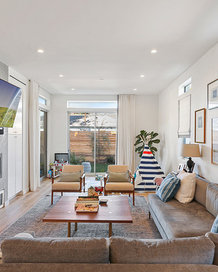
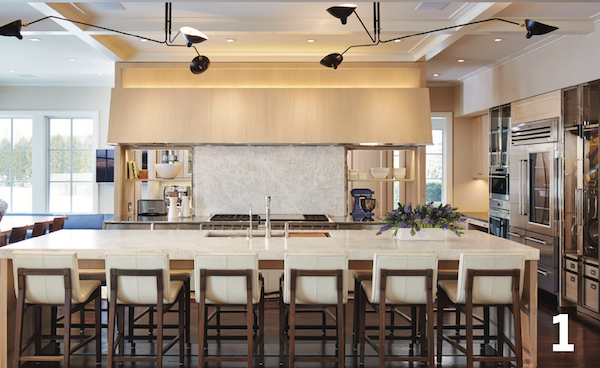
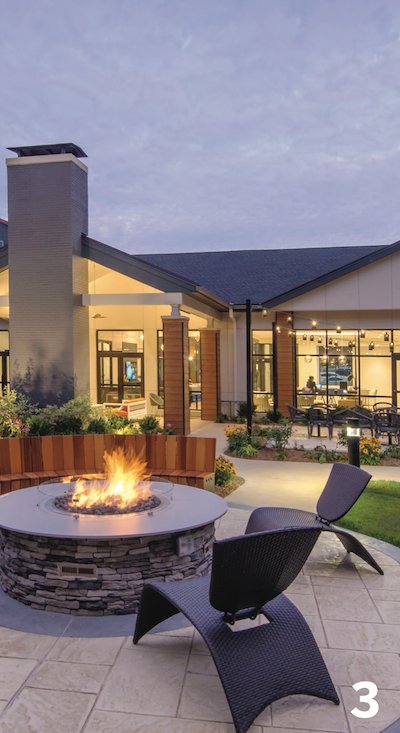
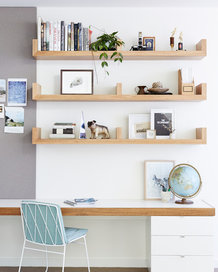
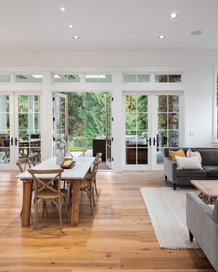
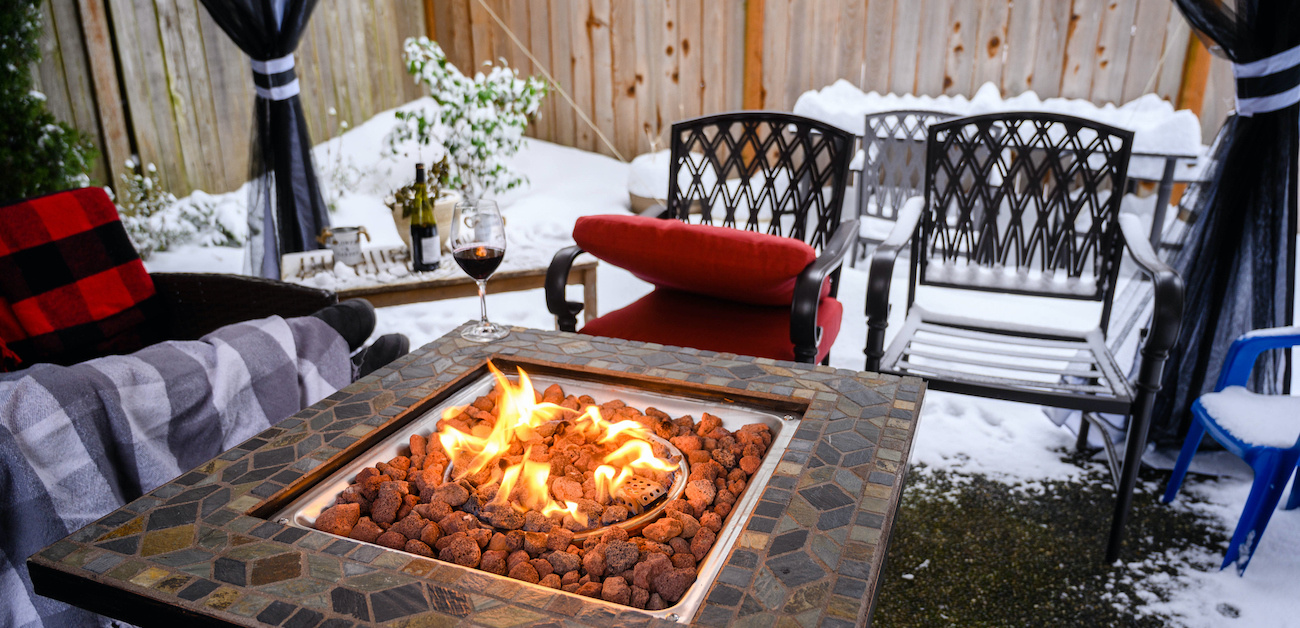
1. Link the indoors and outdoors by blurring lines. The most common way to do this is to add more windows and doors to connect the spaces and make the glazing bigger to achieve better views. It can also be done by using more colors and textures found in nature inside the home and bringing in plants. Homeowners can also decorate outdoors as they do inside, according to the online design resource, Houzz. The company’s search data shows that people want their backyards to be relaxing extensions of their interiors, which can be handled with stylish, durable materials, as well as by adding a fireplace or fire pit, outdoor TV, sound system, and comfortable seating, pillows, and rugs.

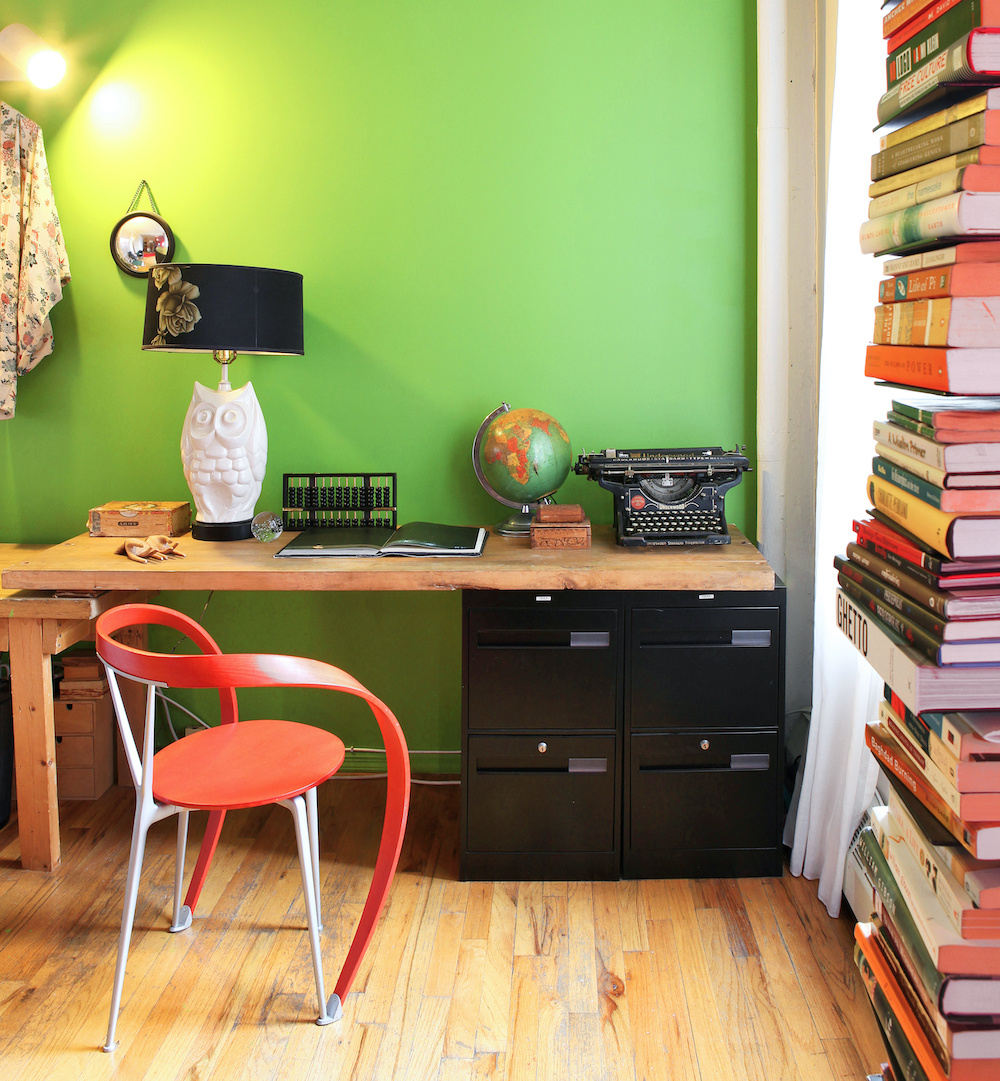
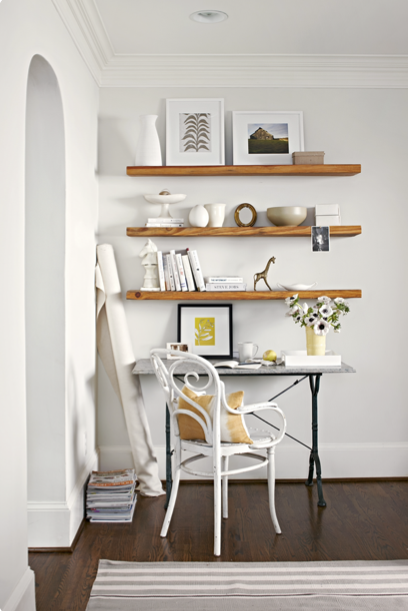
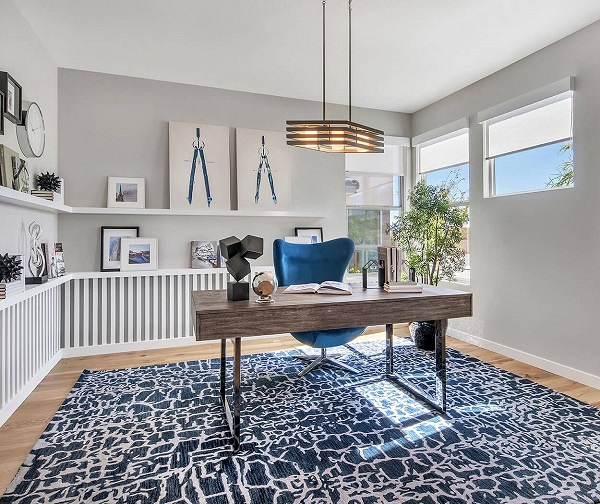
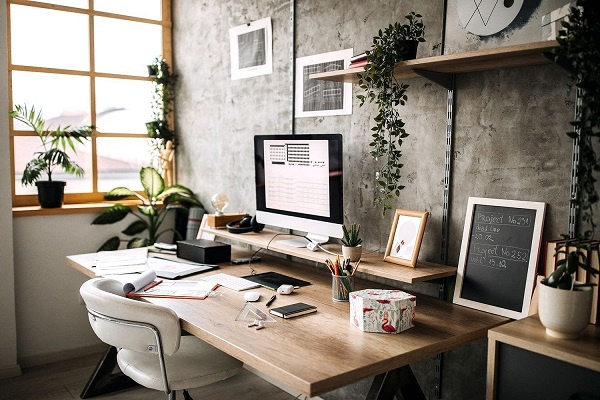
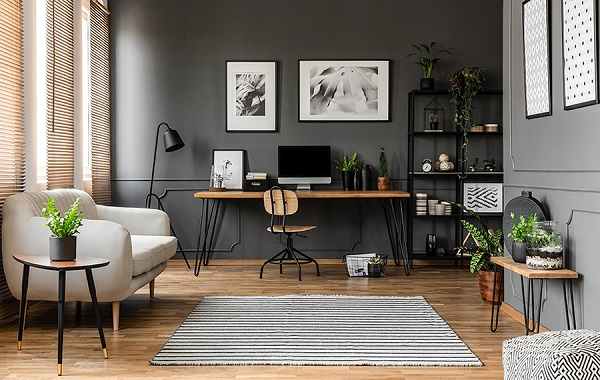
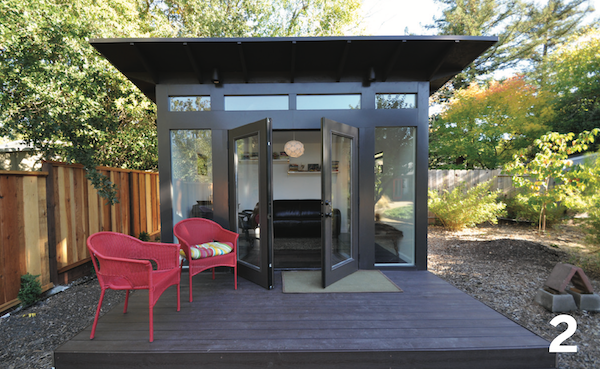
2. Set up an outdoor office. Many people made do with cramped makeshift offices during the pandemic. Others created separate indoor spaces but working outdoors can literally offer a breath of fresh air to ramp up creativity. Flowers, bushes, and trees can become the living backdrop on conference calls instead of the kitchen counters or office bookcases. Essentials to make it work include strong Wi-Fi, an electrical outlet or two for equipment that’s not wireless, a sturdy table for a laptop, a comfortable chair, lighting for night-time work, and a rug to add warmth underfoot. Some may want a small portable generator to keep power running, Kiser says.

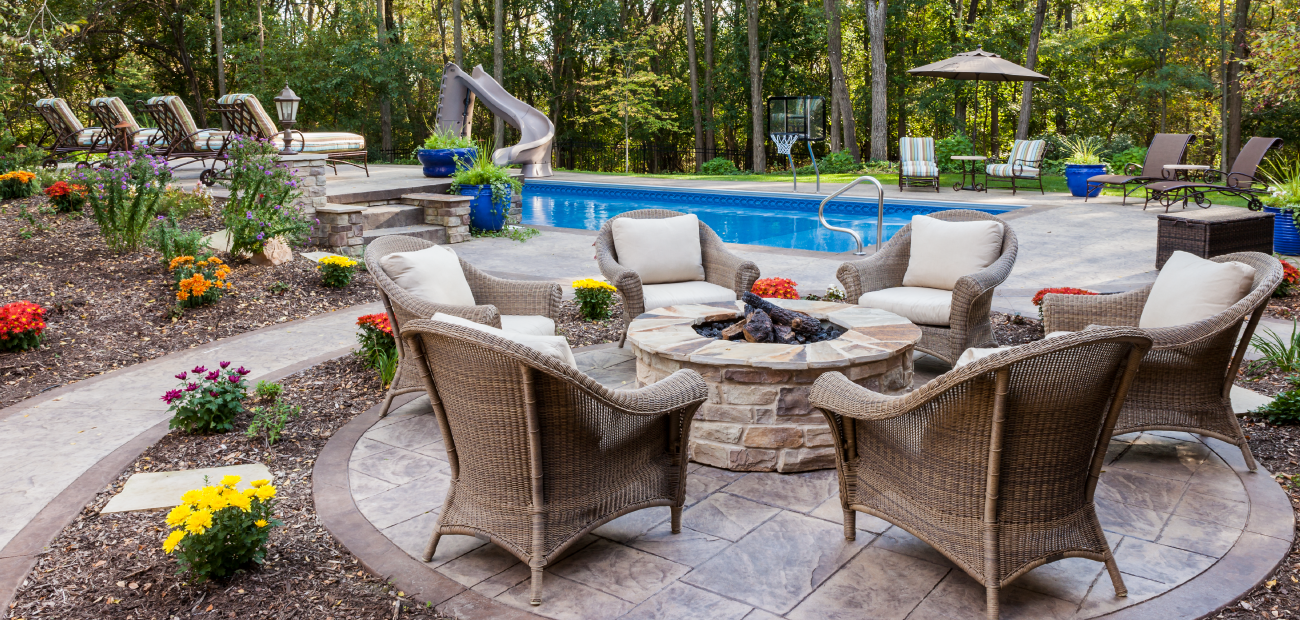
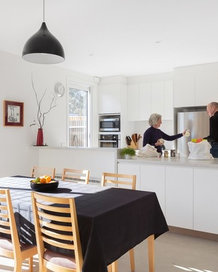
3. Dine al fresco. Homeowners shouldn’t limit themselves to only eating dinner outdoors. Any meal—breakfast, brunch, lunch, cocktails, and snacks—can be enjoyed plein air. They should have a nice flat area, whether a balcony, terrace, or deck, to set up a table and chairs with enough space to navigate around them. Homeowners also should choose a material that won’t need frequent repainting—many closely resemble real wood and stone and are sustainable. Add the right equipment—a grill, pizza oven, running water from a spigot that won’t freeze (or a sink), and firepit—to make the experience more enjoyable. They can hang some lights, maybe a curtain, and if there’s room and funds, construct a pergola for an overhead cover. If the homeowners like the sound of running water, they can add a recirculating fountain so the water won’t freeze in the winter.

4. Add entertainment. All work and no play isn’t fun, and the outdoors is a perfect place for classic games like croquet and badminton, and board games such as Monopoly and Clue, or jigsaw puzzles. Many families are also investing in large-screen outdoor TVs and movie projectors. And then there are all the pools being built. If there is no room or funds, they might consider a less costly above-ground pool or smaller hot tub. Suggest they position it close enough to the house so they’re not trekking far in the cold or snow.

5. Establish a wildlife habitat. Attract pollinators such as bees, butterflies, and birds by planting the right flowers and plants. Add a greenhouse if there’s room, which will allow homeowners to garden all year. A birdhouse and feeder or two, are great additions; even a chicken coop is becoming more commonplace.

6. Make a yard pet friendly. Dog owners could add a fence of some type, maybe a sandpile for digging, a doghouse that’s large enough so Fido doesn’t feel cramped, and perhaps an agility course so he or she gets good exercise. Hardscape like bricks, concrete pavers, or stone can be an alternative spot to urinate that won't ruin your lawn. Also, homeowners can consider some faux lawn choices—many look authentic—and avoid planting things that are toxic to dogs and people, according to The Spruce.

7. Store neatly. Even outdoor spaces can become cluttered. A shed or closet in a garage can be set up with shelves, bins, and hooks to hang rakes, bicycles, helmets, and more. This will also keep tools out of reach of young children, and provide a place to store fuel safely, too, says Kiser.

8. Create some privacy. While homeowners may want to have a friendly relationship with their neighbors, they may also want some privacy at times, especially when working from home or throwing parties. Fences work well, but so can living screens of greenery—rows of trees, bushes, or vines. They should choose native materials that don’t require a lot of watering and consider materials that provide color or texture year-round. Start small with plantings that will grow over time, which is less costly than investing in big, mature plants.

While many of the tips on this list can be undertaken by a skilled DIYer, homeowners should also consider contacting a contractor, landscape designer, or architect sooner rather than later since many are booked far in advance.


Courtesy Barbara Ballinger is a freelance writer and the author of several books on real estate, architecture, and remodeling


How Much Does Air Duct Cleaning Cost, and Is It Worth It?

  • By
  • Posted

You might be thinking about getting your house’s air ducts cleaned after watching a TV commercial that flashes pictures of dusty, moldy, dirty vents. It’s definitely enough to make you wonder what’s lurking in your ductwork. But is it worth it?

Picture Windows

Photo: Nataliia / Adobe Stock

Written by Dawn M. Smith

The average amount to clean your air ducts is $370 

The typical cost to get air ducts cleaned is between $270 and $490.  But, depending on the duct’s condition, fees can climb to $1,000.

Is Air Duct Cleaning Worth It?

When you search the pros and cons of hiring a local air duct cleaners, you’ll find conflicting advice. 

The Environmental Protection Agency (EPA) says that from their studies, standard duct cleaning does not prevent health problems or reduce dust levels in your home. But they do recommend professional cleaning if there is visible (and confirmed by a lab) mold growth inside the vents or within the heating and cooling system. Wet insulation is a typical cause of a mold outbreak.

They also recommend cleaning your ducts if they’re infested with rodents and insects or clogged with excessive amounts of dust and debris that hampers your HVAC system and blows nasty particles through your home. If you have asthma or other respiratory issues, you might breathe better with clean ducts. You’ll have to think about your health situation to decide if you need air duct cleaning and if it's worth your money.

How Much Does It Cost To Clean Air Ducts?

Air duct cleaning costs an average of $400. But the price is affected by several factors like the size of the house, the total number of ducts, and how complicated the ducting system is. You could pay between $700 and $1,000 for a large home. 

The good news is you only need to have your ductwork cleaned every two to seven years unless you notice an issue with pests, allergenic mold reactions, or have breathing problems that improve after a cleaning.

Correct Air Duct Cleaning Costs More 

The air duct cleaning company you hire should spend between three and four hours inspecting and cleaning all system parts, including the heat exchanger, blower, drain pan, plenum, and coils. Be cautious of companies that finish fast, especially if you chose a discount special. They may only clean some of the vents for a low price. 

Be sure to ask if they use outdoor vented equipment. Most top air duct cleaning companies use this equipment, so all of the debris they capture is vented and contained outside the house. Inferior techniques used by cost-cutting companies could worsen the situation by damaging the ductwork or setting off more dust and dirt into the air inside your home. 

Don’t be surprised if your vetted professional suggests repairs or upgrades to your furnace or blower motor. It’s common to find other issues during the cleaning process. 

Here’s an idea of the costs of common repairs.

  • Furnace repairs: $130–$500

  • AC repairs: $160–$550


What Factors Influence The Cost to Clean Your Air Ducts? 

Don’t expect your costs to add up exactly like your neighbor's, even if they let you use their coupon. In addition to the size of the house and the number of vents, several other factors impact your final invoice.

The Number of Vents 

Vent cleaning costs can be broken down in various ways by your service provider. If the contractor charges per vent, expect to pay about $25 to $50 per vent. Other companies charge a flat fee in addition to the cost per vent. 

To total the average amount, count your vents, grab your calculator, and multiply by $35. This figure takes into account that each vent connects to the central system through each room and the amount of work it takes to clean.

The Appearance of Rodents 

There’s not much you can do to avoid air duct cleaning fees if you have rodents. This is one scenario where the EPA says to seek help from professionals because droppings in the ductwork can cause breathing problems. Note, you’ll probably have to hire an exterminator first. Extermination costs run between $150 to $500. No doubt, it’s money well spent for a peaceful night’s sleep. 

Vent and Duct Accessibility

If your home has hard-to-reach crawl spaces and attics to access your central HVAC system, you could pay more for the extra work involved. Your cleaning crew will let you know of their additional fees. 

Mold and Mildew Removal

Another situation where the EPA recommends duct cleaning is after you’ve verified mold growth. Although mold removal in your ductwork costs more money, likely between $600 and $2,000, it could save you thousands if you stop the mold before it spreads further. Depending on the level of contamination, there’s a good chance your contractor will suggest a mold specialist do the cleanup if it's out of their realm of expertise. 

Custom Designed Ducts

Cleaning and repairing custom ductwork is typically more expensive because the specific sizing is challenging to work with, and it’s harder to find replacement parts. After the initial inspection, your air duct cleaning contractor will tell you to either clean or replace the air ducts. If your pro has to work longer or hire a bigger crew to do custom work, expect to pay 25% to 30% more.  


Planning To Sell This Year? Start Getting Your Home Ready Now

  • By
  • Posted

Yes, it may still be winter but the home buying and selling season has already begun. If you're thinking of putting your home on the market, now's the time to whip it into shape.

Below are the top preparations to address... why not start now!

Update your home

With asking prices at an all-time high, most of today's buyers are looking for turnkey, not a project. You know, all those things you wanted to change in your home but never got around to doing! Well, here's your chance. Consider giving your home a refresh, with new countertops, appliances, and flooring. Change out vanities and plumbing fixtures in your bathrooms and if your cabinets are dated, it might be time to have them painted or refaced along with new hardware. Not only will this give your listing some appeal, it may also aid in increasing what goes in to your pocket.

Declutter, Organize, and Clean

No one wants a messy home. If you're serious about selling this year, now is the time to get rid of any unwanted or unused items sitting around the house taking up valuable storage space. Remember, the goal is to show how much space your home has not how cluttered it feels. You want buyers to be able to come through and focus on the space and not the stuff in it!

Windows and Screens

When was the last time you had the windows and tracks cleaned both inside and out? Are there any windows that appear clogged or are difficult to open and close? Very few sellers take the time to check their windows and screens. So to get a leg up on your competition, by cleaning, repairing and making all of them look and work great, will help you justify asking top dollar.

Landscaping

Overgrown bushes, trees and old plants can hide a homes exterior and make it look tired and unnecessarily worn. Don't forget to give your home as much attention on the outside as you do on the inside. Now is the time to have bushes and trees cut back or removed altogether. And when the weather permits, don't forget to freshen up your ground cover as well with new mulch, pine straw or river rock. In the meantime...

Call us

We offer free market analysis of your home. It will determine the value of your property based on other properties, similar in nature that have sold or are currently on the market. 

List with us 

Our team of agents provide professional, courteous service that you can rely on from beginning to end. We look forward to hearing from you!

Melanson Real Estate

Office: 603-569-4488

Mobile: 603-651-7228


7 ‘Design Therapy' Hacks to Improve Your Office

  • By
  • Posted

A well-designed work area can improve your mental and physical health. Here’s how to create your best office space.

well-designed work area can improve your mental and physical health

by Melissa Dittmann Tracey

Could an inviting workspace make you feel better and work smarter? Jessica Shaw, interior design director of Turett Collaborative, believes it can. She offers steps to practice “design therapy” for your office space, factoring in colors, layout, lighting, and more.

Shaw draws from “neuro-architecture,” which explores how art, color, lighting, and design in your office space can affect a person’s mood, productivity, and health.

She offers the following tips for creating an office that boosts mental and physical health, whether it’s your work-from-home area or in-person workplace.

1. Use color smartly.

Color can potentially affect a person’s mood, emotions, concentration, and even physical health, according to a body of science called color psychology. Draw from some of these insights to outfit your workspace.

  • When to use brighter hues: For example, bold, bright colors like yellow have been linked to boosting positive thoughts and sparking creativity. Red can stimulate and energize. For detail-oriented work, you may benefit by adding red accessories to keep you focused, Shaw says.

bright colors boost positive thoughts and sparking creativity

©Turett Collaborative

  • When to use softer colors: Lighter shades of blue and green can bring a sense of calmness to a space. These colors tend to work best in lounge spaces and break areas, Shaw says.

  • When to use white: Use white sparingly in furnishings and accent pieces. Too much white can make a space feel cold and uninviting. Use white more as an accent color or within a more monochromatic color scheme, Shaw recommends. She suggests reserving white for more serious spaces in a workplace, such as conference or meeting rooms.

using white as an accent color or within a more monochromatic color scheme

©Turett Collaborative

A balanced composition of white and color brings visual harmony to the Turett Collaborative’s Civic Hall lounge area.

Use the color wheel for inspiration for the color of your workspace, Shaw suggests.

  • Choose analogous colors: Groups of three colors beside one another on the color wheel (e.g. blue, blue-green, and green)—to create harmony in your office.

  • Reserve complimentary colors: Opposite hues on the color wheel—for a bolder look (e.g. yellow and purple or orange and blue).

  • Consider triadic colors: Three colors equally spaced on the color wheel—for a more energetic, personality-filled space (e.g. red, blue, and yellow). 

  • Use color with intention: Pops of red energize this office space.

balanced composition of white and color brings visual harmony

©Turett Collaborative

Also, Shaw recommends strategically using different hues, tints, tones, and shades to draw attention to certain objects within the workspace.

using different hues, tints, tones, and shades to draw attention to certain objects within the workspace

©Turett Collaborative

An energizing palette of triadic colors adds an element of contrast to the Turett Collaborative Civic Hall dining area.

2. Don’t play it too safe.

You want your workspace to have a sense of harmony, but you also don’t want it to bore you, your agents, or staff. When using interior elements that are too similar, your space can appear dull. But you want a workspace that will visually stimulate. To do that, bring together pieces that juxtapose one another in color, form, or aesthetic to liven up the workspace, Shaw says.

“To break up the rigidity of a grid-based layout often seen in traditional offices, try incorporating organic, soft shapes to add a layer of dimension, dynamism, and visual complexity,” Shaw says. “Balancing masculine and feminine pieces is a great example of creating tension to achieve a cohesive, yet elevated look.”

incorporating organic, soft shapes to add a layer of dimension, dynamism, and visual complexity

©Turett Collaborative

Interior designer Jessica Shaw creates a bold, yet balanced atmosphere with the use of complementary reds and greens in her personal home office.

3. Go abstract with your art.

Abstract artwork could make you feel more creative and spur more innovation in the workplace. “Art is an incredibly influential aspect in impacting moods and the feel of an environment,” Shaw says. “In a sense, it can be a reflection and extension of your company or individual brand.”

Abstract artwork make you feel more creative and spur more innovation in the workplace

©Turett Collaborative

The colorful artwork on the wall of Turett Collaborative’s Civic Hall aim to project visual complexity and stimulation. Large abstract prints can command attention and make a statement.

A gradient tile art piece of geometric patterns composed of sage greens and blues adds texture to the space

©Turett Collaborative

A gradient tile art piece of geometric patterns composed of sage greens and blues adds texture to the space.

4. Maximize the light.

Factor in sunlight when determining the optimal layout for the office. Brighter work environments with natural lighting can help make workers feel more productive, according to a 2018 study conducted by Cornell University Professor Alan Hedge. Natural light also can help reduce eyestrain, drowsiness, and headaches, and even elevate a person’s mood.

Try to locate desks near windows to gain the benefits of natural light, Shaw says.

locate desks near windows to gain the benefits of natural light

©Turett Collaborative

5. Section off with the flooring.

The flooring can greatly enhance the overall look of a room. “Carpeting provides a softer feel to a space while hardwood floors create a strong, polished look,” Shaw says.

In the workplace particularly, different flooring can help section off spaces in the absence of walls. Use a variety of flooring as an alternative to physical dividers like cubicles. It can keep the space feeling more open, too.

“Lines also encourage movement; our eyes are trained to follow lines in the direction they flow,” Shaw says. “For instance, vertical lines promote movement and mobility, whereas horizontal lines create a grounded, secure feeling.”

Try vertical running wood or carpeting along hallways to bring about movement and then use horizontal lines in spaces for relaxation and lounging, Shaw recommends.

vertical running wood or carpeting along hallways to bring about movement and then use horizontal lines in spaces for relaxation and lounging

©Turett Collaborative

Opposing carpet patterns can liven up a monochromatic scheme for a hallway while also creating the perception of two work zones.

6. Minimize visual and noise distractions.

The more objects and items on display on a desk, the more visual and informational processing a person has to do. That can make it difficult to concentrate on work.

Visual clutter hampers organization and productivity. Noisy offices also can be a detriment to your mental health. This also applies to those who work from home, who may face noisy pets or neighborhood construction.

Consider furniture and design elements that can absorb sounds, such as carpeting, acoustic wall paneling, or drapery.

©Turett Collaborative

Pullout drawers allow for discrete organization, keeping the office of this apartment clean and uncluttered. Carpeting provides sound absorption.

7. Follow the principles of proxemics.

Let the law of proxemics be your guide to designing your office space. It states that various distances can serve different forms of interaction.

For example, a distance of 1.5 feet to 4 feet best facilitates friendly, casual conversation, while distances less than 1.5 feet promote a stronger connection between individuals.

“It is important to design a work environment that allows for these varying degrees of physical separation to help promote both individual work and collaborative efforts,” Shaw says. “Alleviating stress and fostering a safe environment contribute to employees’ overall well-being and comfort.”

This may be even more important as more people prepare to return to the workspace after working from home during the pandemic. Open hallways and additional spacing between workstations reduce visual congestion and naturally create social distancing and separation for employees who prefer that, Shaw says.

Turett Collaborative’s Civic Hall design layout includes both up-close and distanced working arrangements to suit the needs and comfort levels of all workers.

©Turett Collaborative


Melissa Dittmann Tracey is a contributing editor for REALTOR® Magazine. 

5 Easy Decor Hacks That'll Brighten Your Home-and Your Mood-This Winter

  • By
  • Posted

If you struggle with seasonal depression, these simple indoor winter decorating ideas can lighten your home and mood.


By Katie Holdefehr | Updated October 13, 2021

As the days get shorter and our homes get darker, it's easy for the dim light and cold weather to put a damper on our moods. If you're determined to beat the fall and winter blues this year, there are some scientifically-backed methods to try, and you can also adjust your home decor to make your space a cheery oasis. 

While there are only so many days you can spend snuggled up on the sofa before you start wishing for springtime, these easy decor tricks will make your home a lighter, brighter, and cozier retreat this winter. According to designer Nicole Gibbons, all it takes is a fresh coat of paint, some carefully chosen window treatments, and a few live plants. Even a simple swap like changing the light bulbs in a room can make your space feel cheerier. Here are five designer-approved ways to design a home that will help you fight the fall and winter blues.

1 Brush on a Bright, Warm Paint Color

Consider the paint color on the walls in the spaces you tend to hang out the most in the winter, like the living room or kitchen. Before winter really hits, think about painting the room a neutral color with warm undertones, like Timeless from Clare. "It will bring a clean, bright feeling to your space and the cozy, almost ivory winter white look adds a soft and relaxed warmth to your home," Gibbons says. If you and your family hang out all winter in the kitchen, this creamy white will make the room feel less sterile and more inviting.

And if you're craving a little more color? "I also love vibrant hues that brighten and uplift a space during a cold, dreary winter and also look great year-round. A bright, airy color like Headspace will reflect light and help open up a room," Gibbons explains.

2 Introduce Live Plants

Even if the trees outside your window are bare, you can still bring leafy greenery into your home this winter. Plants not only add color and life to a room, but Gibbons points out that studies have shown that the presence of nature may lower blood pressure and reduce anxiety. Our advice: start out with some easy-to-care-for house plants so you can get the full stress-busting benefits—without worrying about keeping your new plant babies alive.

3 Switch Out the Light Bulbs

Less hours of sunlight and cloudier skies are a big factor contributing to the fall and winter blues. To make the inside of your home feel bright and sunny, Gibbons suggests switching to LED light bulbs, which emit the most light while using the least amount of energy (bonus: you'll also save money on your utility bill). Look for LED bulbs in soft white, which will brighten the room, without making it look too stark.

4 Let the Light In

Since there's less natural light streaming in the windows in the winter, make sure your decor maximizes what little sunlight there is. Gibbon's recommendation: Opt for sheer curtains that won't block the light, as well as stylish pullbacks. When installing a curtain rod or brackets, make sure to set them slightly outside the window frame, so that when the curtains are pulled open, they won't block the sides of the window.

Check: is there anything blocking the windows, like plants, furniture, or lamps? Relocate these items to let more light in.

5 Add Bursts of Color

When it comes to winter decor, we naturally think of darker, moodier hues. But Gibbons recommends trying something new this year. "Bring in fun pops of color in your throws and pillows to help brighten your space even more," she says. Warm red throw pillows or dish towels will add energy to the space—and a sense of playfulness will make you smile more than decor that takes itself a little too seriously. Buy inexpensive throw pillow covers you can swap out whenever you're craving a change of scenery.


Katie Holdefehr is a senior editor at RealSimple.com, where she writes about everything from decor ideas to dryer balls. 

How to Transform Any Room Into a Flexible Space for Multi-Purpose Living

  • By
  • Posted

Learn how to convert an underused area of your home into a customized space that best suits your needs.

By Jessica Bennett 

As lifestyles shifted due to the coronavirus pandemic, our homes had to adapt to new activities and routines. Dining rooms and closets became home offices, kids' bedrooms served as homeschool spaces, and guest rooms were outfitted with workout equipment. These multi-purpose rooms were born out of necessity, but even as we look toward a post-pandemic future, homeowners are increasingly using "flex spaces" as a versatile solution for previously underused areas. "The trend has found staying power as people realize they can more efficiently use their spaces in sustainable ways," says Cameron Johnson, founder and CEO of Nickson, an apartment-furnishing service.

Flex spaces are intended to help your home better accommodate your day-to-day life. Guest bedrooms, for example, can often be reimagined for more frequent and flexible use. "People are realizing that an entire room in their home dedicated to an occasional houseguest may not be the best use of space—a commodity that has become decidedly more precious over the past year," says Los Angeles designer Stefani Stein. To maximize function within your home's existing floorplan, follow these tips for creating a flex space that works with your lifestyle.

CREDIT: EDMUND BARR

1. Think outside a room's assigned function. 

Consider your home's least-used spaces, such as a formal dining room, breakfast nook, sitting room, or extra closet, and how they could be put to better use. Your home's builder might have intended the room for a specific purpose, but feel free to readjust if that doesn't align with your everyday priorities. "Nothing is off-limits for reimagining how a space can be used," says interior designer Shaolin Low of the Honolulu-based Studio Shaolin. 

A flex space should be designed around the activities that will take place there, such as working, exercising, doing homework, and more. "People are surprised by how cohesive they can make a space if they start from 'What should the space facilitate?' versus 'What is supposed to be in this room?'" Johnson says.

CREDIT: NATHAN SCHRODER

2. Consider your long-term needs. 

As you configure your flex space, consider how your needs might change as time goes on and plan for flexibility, Low suggests. "If you have young children at home, think about how it will be utilized as they grow up. If you will host a lot of family or guests in the future, think about how you'll accommodate," she says. Opt for lightweight, easy-to-move furniture to help ensure your setup can be rearranged as needed. "When it comes to exercise, consider alternatives to large and bulky equipment such as tension bands," says Tiffany Piotrowski of Tiffany Leigh Design. "These can be kept in a decorative bin or basket and still provide a full-body workout."

3. Plan for storage. 

Incorporate plenty of storage into your flex room to manage clutter and maximize space. "Add storage that can be closed off—cabinets with doors to hide messes and contain all the items necessary for whatever activities will be taking place in the room," says Austin-based interior designer Killy Scheer. Choose furniture or containers that can stylishly and efficiently accommodate your storage needs, whether that's for workout gear, office supplies, toys, or other items.

CREDIT: DANA GALLAGHER

4. Compartmentalize the flex space. 

If your flex space will serve multiple functions, section off areas of the room for each need, suggests Pramiti Bhargava of BlueGrape, a San Diego staging company. For example, designate one corner for a home office and use the other side of the room as a workout space. Room dividers or shelving units can serve as physical barriers that separate the space and offer added privacy. For a visual cue, lay down rugs or paint an accent wall to specify different sections.

5. Use flexible furniture. 

"If you want to have a multi-purpose space, you need to have multi-purpose furniture," Low says. Outfit your room with pieces that can transform to suit different needs or activities. Look for nesting furniture that can be stacked or separated, tables with extendable leaves or fold-down mechanisms, and armoires that can open up to reveal a workspace, suggests Scheer. Just be sure to measure the room carefully before purchasing furniture.

6. Reflect your personality. 

Customize your flex space to suit your style. Use it as an opportunity to go bold with a dramatic paint color or patterned wallpaper. Or tailor it to a certain hobby or interest. "There are so many creative ways to utilize extra space, so take it as an opportunity to showcase your personality and passions," Bhargava says.


Jessica Bennett, Assistant Home Editor — Better Homes and Gardens

Alternative Ways to Hanging Artwork

  • By
  • Posted

Artists provide creative methods for hanging your masterpieces that won't ruin your walls. 

CREDIT: D3SIGN / GETTY IMAGES

By Brigitt Earley,

If you're starting to build a collection of art, chances are you want to display your investments proudly. Otherwise, maybe you simply want to show off your favorite family photos. Whether photos or paintings, wall hangings have the profound ability to pull a space together in an instant. But what if you rent your place and have to keep the drywall intact or have intricate millwork that you don't want to mar with nail holes? You aren't relegated to a world with drab white walls. There are plenty of ways to hang artwork without making a single hole in the wall. 

The most common way to hang artwork without nails is by using Command Strips. You simply plan how you want to arrange your picture, then apply one half of the hook and latch strip to the wall and the other to the frame. Then, you stick them together to secure the picture or painting to the wall. When you go to remove them, they don't cause any damage to paint or drywall.

To go beyond this common hack for hanging artwork, we asked the pros—artists, DIY experts, and interior designers—for other creative solutions. Here's what they had to say.

Magnetic Paint 

To design a gallery wall that can be rearranged on a whim, use Rust-Oleum Magnetic Paint and adhesive-backed magnets to the back of lightweight prints or photo frames, says Audrey Van de Castle, manager of Stanley Black & Decker's Maker Initiatives. You can even try painting the magnetic paint in fun accent shapes around the artwork.

Display Easel 

Try showing off larger paintings on a display easel, says artist Corey Paige. "No matter what the piece you're displaying is, it automatically adds a unique touch to your space," she explains. "You don't typically expect to walk into someone's home and see art displayed on an easel—it's always a conversation starter, since it highlights the art."

String and Clothespins 

Another option? Use tape or mounting putty to string a piece of twine across your wall, then use decorative clips or clothespins to display prints along the line, says Van de Castle.

Suspended from the Ceiling 

If you have tricky wainscot or tiled walls, drive hooks into the ceiling instead, says Lindsay Pumpa, owner of L Pumpa Designs. Then, you can use rope, leather, or chains to suspend the framed artwork.

Wire Grid 

If you're looking to occupy more vertical space, a wire grid is another method that's perfect for your desk area, says Paige. Simply use clothespins to attach your favorite prints or photos.

Ladder Shelves 

Framed prints look great displayed on a ladder shelf, since leaning art is a great way to add dimension to a room, says Paige. Simply frame your artwork and prop it on the shelf. If your ladder shelf leans against a wall, you can display a larger framed print on the top shelf.

Room Divider 

Another fun way to arrange small works of art into a sort of gallery wall? On a folding screen or room divider, says Pumpa. This serves as an excellent way to divide a studio apartment into multiple "rooms," while also creating a cool focal point.


Brigitt Earley is a freelance writer and editor based in New Jersey. Her work has been published in a wide range of women's lifestyle magazines, including Martha Stewart, Real Simple and Oprah.

Lumber Prices Are Dropping Fast

  • By
  • Posted

Lumber prices are falling quickly from record highs, and that may be happening at the right time for the new-home market.

Photo Credit: Nathalie Dupont - Getty Images

By REALTOR Magazine

Home builder sentiment sank to its lowest level since August 2020, with builders blaming increasing material supply challenges for their outlook, according to a newly released report from the National Association of Home Builders. Builders said that declining availability for softwood lumber and other building materials is pushing builder sentiment down in June, at a time when buyer demand is surging.

Lumber prices have been increasing for months, prompting builders to raise their prices and, in some cases, to stop taking new orders due to the difficulty of pricing projects accurately during the course of construction.

But wood prices are coming down—and they’re falling fast. For example, futures for July delivery of lumber were $1,009.90 per thousand board feet, a 41% drop from the record of $1,711.20 reached in early May, The Wall Street Journal reports.

“The rapid decline suggests a bubble that has burst and the question is how low lumber prices will fall,” The Wall Street Journalreports. “Even after tumbling, lumber futures remain nearly three times what is typical for this time of year. Lumber producers and traders expect that prices will remain relatively high due to the strong housing market, but that the supply bottlenecks and frenzied buying that characterized the economy’s reopening and sent prices to multiples of the old all-time highs are winding down.”

During the run-up in lumber prices, some builders began hoarding lumber to shield themselves from any future gains and to ensure they didn’t run out of it during construction. Housing analysts predict the new-home market will see greater “shadow inventory” as businesses begin to sell their own stockpiles.

“I don’t think $1,000 lumber prices are the new normal,” Devin Stockfish, chief executive of Weyerhaeuser Co., a lumber producer, told investors last week at a conference. “But that being said, when you think about the amount of housing that we’re going to have to build in the U.S. over the next three, five, 10 years, that’s just a significant amount of demand for wood products.”

Source: “Lumber Prices Are Falling Fast, Turning Hoarders Into Sellers,” The Wall Street Journal (June 15, 2021) [Log-in required.] and “Rising Material Challenges, Declining Builder Sentiment,” National Association of Home Builders (June 15, 2021)

So You Bought a Fixer-Upper to Save Money-Here Are the Projects to Prioritize

  • By
  • Posted

If you're embarking on renovations on a tight budget, it can be difficult to decide what to do first. In the article below, experts identify the best projects for your wallet and your home.

By Mia Taylor

The vast majority of people who purchase fixer-upper homes do so for financial reasons— because they generally can't afford a turn-key property. A recent report from Buildworld, a UK company that connects buyers with building materials, reveals that 73% of people who buy fixer-uppers do so because of money issues. This financial reality, however, can present a perplexing challenge when moving into a home that's in need of a little (or a lot) of TLC. Which renovation projects should you focus on first if your budget is tight? And why?

According to Buildworld, the average spend on "necessary repairs" is about $13,000, and "practical upgrades" cost about $6,000. We asked experts to help identify the fixer-upper projects that make the most sense right out of the gate as well as those that will give you the most bang for your buck. Here's what the industry insiders had to say, along with a few tips on how to get organized as you embark on your fixer-upper facelift.

white house wooden fence

PHOTO CREDIT: KIM CORNELISON

Before You Start Remodeling 

First things first: It's essential to understand what work should be done for safety reasons and to prevent costly challenges down the road. The best way to do this is to have a professional assess your newly purchased home and use that insight to develop a game plan.

"Create a priority list and start with what must be fixed," says Robbie Maynard, San Diego-based interior designer and owner of Robbie Interiors. "Hire an inspector to look for potential issues or hazards with electrical, plumbing, and the roof. It's a good idea to start with the structure and take care of items like electrical, which can be a potential fire hazard, as well as plumbing issues so that you don't end up with major problems or damage in the future. You will not see a great transformation, but it brings peace of mind."

Hiring an expert to create a cost estimate for your renovations can give you a realistic assessment of how much money you'll need to accomplish each item on the list and help you decide what you can afford to do first. And remember, while safety repairs are likely to be among the most expensive, they're critical to laying the proper groundwork for subsequent projects.

"Upgrading plumbing and electrical is always expensive," says AmyLynn Schwartzbard, owner of New York City-based Life Designs Group. "A two-bedroom, two-bath home could run $25,000-plus for all new electrical wiring and outlets. Plumbing could run $15,000-plus. But the additional work isn't worth doing if the inner runnings of the home are in disarray."

black and white living room

PHOTO CREDIT: JOHN BESSLER

1. Refresh Rooms with Paint 

Once you've addressed safety matters, you can turn your attention to aesthetic renovation projects and upgrades. Adding a new coat of paint throughout your home can make a big difference without a big investment, says Stephanie Lindsey, principal designer with Texas-based Etch Design Group.

"A fresh coat of paint on walls goes a long way for our mental health," says Lindsey. "We feel rejuvenated and like we have a clean slate to start a new chapter. You can paint walls, cabinets, or even your front door for a fresh new look."

The best part: a paint project can cost as little as $50, depending on the scope. Maynard also notes that paint almost always needs a refresh anyway when a home transitions from one owner to the next. "New paint is the first thing that makes a huge impact," says Maynard. "The great thing is you can paint yourself and save on this one."

For an added style boost, consider painting an accent or focal wall, which is generally the wall you first see when entering a room. It might also be the wall where your sofa or your bed is located.  "Dark gray or smoky green or blue are all popular colors," says Maynard.

kitchen with large island and wood floors

PHOTO CREDIT: WERNER STRAUBE

2. Install New Flooring 

Another project that can make a tremendous and immediate difference in a fixer-upper is flooring. Maynard recommends luxury vinyl plank flooring to save money, which runs about $5 a square foot.

"It's the best thing since sliced bread," says Maynard. "It looks like real wood for a fraction of the cost. I love the chevron or herringbone patterns, which I have been specifying in many of my projects. Luxury vinyl plank is also water-resistant and can be used in bathrooms. New flooring and paint will transform your fixer-upper right before your eyes."

Not only will new flooring brighten a fixer-upper visually, but tackling this type of change early on can be much easier logistically. Once you've moved in and your furniture and personal belongings fill every room, redoing flooring can be challenging at best.

"It can be downright unbearable while the work is being done," says Ron Leffler, of Virginia-based Ron Leffler Real Estate. "It usually takes several days from beginning to end. The smell from the fresh polyurethane [if you're refinishing hardwood floors] can also take a day or two to dissipate."

One additional consideration: the color you select for your vinyl flooring or floor stain will also help set the stage for future updates in your home.  

White house porch people front yard

PHOTO CREDIT: KIM CORNELISON

3. Upgrade the Exterior 

Exterior upgrades are also an important consideration for fixer-uppers and can be more affordable than interior changes, which often require plumbing and other system improvements. The 2020 U.S. Houzz & Home Study found that 21% of renovating homeowners tackled roofing, windows and skylights, and exterior paint projects at a median spend of $8,000, $3,900, and $1,000, respectively. Outdoor yard and landscaping projects are also a good idea, says realtor Jennifer Thomson.

"Don't forget about your fixer-upper's curb appeal; the neighbors will thank you and you will be able to enjoy your yard in the summer months," says Thomson, who recommends adding grass for starters. "If you use fast-growing grass seed, you will have a lush lawn surrounding your home in no time. Most homeowners spend between $450 and $900 on lawn seeding a 5,000-square-foot lawn. When it comes time to sell your fixer-upper, the curb appeal will add thousands to the value of your home."

Bermuda grass germinates in as little as seven to 10 days, while Buffalo grass can take two weeks to 30 days, says Thomson. Yet another option is Centipede grass, which has a germination time of 14 to 21 days.

black white kitchen modern minimalist butcher block counter range

PHOTO CREDIT: EDMUND BARR

4. Remodel Your Kitchen 

It's no secret that kitchens are often among the priciest renovations homeowners embark upon—because who doesn't want a dream kitchen with all of the bells and whistles right? The good news is that a kitchen renovation doesn't have to cost a small fortune. And furthermore, you might want to prioritize your spending on this space given just how big of a role kitchens play in everyday life. (Not to mention the solid return on investment you're likely to get.)

"The kitchen is one of the most used and important spaces in the home," says Maynard, noting that one way to save costs on improvements in this room is by simply painting your cabinets if they're in good shape, or refinishing them. Taking this approach could cost anywhere from $2,500 to $3,500, Maynard estimates.  

If the doors are not in good shape and won't be much improved with paint, refacing (replacing the doors) can be another budget-friendly cabinet upgrade option. Costs range from $5,000 to $7,000, says Maynard. Bottom line: kitchen renovations do not have to cost in excess of $15,000 or $20,000.

"Everyone thinks a kitchen remodel is super expensive, but it doesn't have to be. The Home Depot cabinets can look great. There are discount granite shops that will cut and install your countertop for much less than the high-end showroom places. I flip houses in California and can get an entire kitchen remodel for under $12,000," says Nancy Chillag of 23rd Street Investors.

Chillag's tricks of the trade include sourcing granite at warehouses, not showrooms, where you can purchase more affordable materials for a countertop upgrade. She also suggests searching for kitchen fixtures and other items at Lowe's or similar big-box, high-volume stores as opposed to high-end showrooms.

cheery entryway with colorful wallpaper and white doors and windows

PHOTO CREDIT: PETER MOLICK

5. Replace Windows 

Installing new windows might not be the cheapest project to tackle initially, depending on who you buy them from (and you should definitely shop around.) But this is an improvement that can pay for itself over the long run by saving you money on utility bills.

"Old windows might have air leaks, which can cause your furnace or HVAC system to work overtime and increase your bills," says Andrew Wilson, a home improvement contractor based in Madison, Wisconsin. "Plus, it also makes living in the home comfier when you don't have to worry about the cold breeze or warm summer heat entering through the windows seasonally."

white kitchen with beige ceiling

PHOTO CREDIT: JOHN GRANEN

6. Repair Drywall and Ceilings 

Yet another home improvement project to consider early on for logistical reasons is major drywall or ceiling repairs, including moving walls. Like flooring, this type of work is best tackled before moving in. 

"Removing popcorn ceiling texture? It's a messy job and much easier to do when you don't have to worry about getting furniture or floors wet and dirty," says Robert Taylor, a rehabber based in Sacramento, California, who's been fixing and flipping homes for more than 15 years.

While most homeowners can remove popcorn ceiling on their own, you'll likely need someone to come through to retape and texture the ceiling, says Taylor, owner of The Real Estate Solutions Guy. Expect removal of acoustic ceiling texture and retexturing to cost around $2 to $3 per square foot, says Taylor.

How to Get the Most for Your Money 

Whether you choose to start with new flooring, kitchen renovations, updated ceilings, or drywall, if you're hiring a professional to do the work, it's best to shop around to make sure you're getting a good price. This will also help you develop a more complete picture of the expenses involved.

"Get at least three qualified quotes from contractors to do the work," says John Bodrozic, co-founder of HomeZada, a platform that helps homeowners manage renovations. "This is where you start to see what the total cost of the project is beyond material costs, because the contractor quotes will include their labor costs, their tools costs, insurance costs, and their goals for profit on the project."

One more point about selecting a contractor: the lowest bid is not always the best bid, even when you're on a tight budget. 

"Hire the right contractor, don't hire the cheapest contractor to save money," says Chillag. "It will cost you more money in the long run. Get recommendations for contractors, interview them, and talk to their prior clients. A good contractor will look at your remodel wish list and give you advice on how to save money and what order to do things in so that you're not undoing work later on in the remodel process."

Final Considerations 

Buying a fixer-upper can be a wise way to get into homeownership on a budget. It can also be a monumental undertaking and a labor of love, particularly if you intend to stay in the home for the long haul rather than simply flip it in a few years. No matter which camp you're in, make sure you thoroughly understand the work that needs to be done and why before diving into any projects. After all, mistakes can be costly and if your budget is already tight, it's best to spend your money judiciously as a new homeowner. Doing this requires being educated about your choices.

"One of the biggest tips anyone should know about renovating a fixer-upper is ensure the correct thing is being fixed. A common mistake is people thinking for instance that if floors aren't leveled correctly, they need to replace the flooring. That's a costly mistake since most of the time it's not a flooring issue, but instead a problem with the home foundation," says Wilson, the home improvement contractor. "It's essential to be sure that what's actually causing the issue is what's being fixed."


Mia Taylor is an award-winning journalist who's passionate about making personal finance coverage accessible and engaging. News organizations she has worked for as a staff member or contributor include The Atlanta Journal-Constitution, the San Diego Union-Tribune, The Boston Globe, TheStreet, Bankrate, MSN, and Cheapism. In 2011, she was a member of a team of KPBS reporters who received a Walter Cronkite Award for Excellence in Journalism. Follow her coverage on Twitter and Instagram.

Why Spring Is the Best Time to Deep Clean Your Home

  • By
  • Posted

Why it's so popular to refresh your spaces during this season every year.

Spring cleaning woman vacuuming floor

By Nashia Baker 

When you think about springtime, fresh blooms, seasonal fruit, and pastel colors likely come to mind. Another (arguably less fun) seasonal association? Spring cleaning. But why do we deep clean our spaces at this time? According to the experts, it's simple: The warm weather makes a maximum refresh possible. "With the ability to open windows and shake the rugs, spring is the perfect time for decluttering and deep cleaning," says Andy Telatnik, the director of marketing for retail at Bona. If you feel the same way, you're not alone. According to a Bona and Harris Poll survey last year, half of the adults in the United States say that the start of spring is all about cleaning; decluttering and polishing floors will be the top two tasks for homeowners this particular season.

Don't forget about the pros of disinfecting during this time of year, either. "Spring is a season when everyone starts spending a little more time outdoors—and more dirt and germs are invited in," explains Julie Mckinney, PhD, R&D director of equity, claims and compliance, hygiene, and home at Reckitt Benckiser. "Even though spring signals the end of the cold and flu seasons, people should still be vigilant about the germs and bacteria living on surfaces and collecting in the spaces in their homes—especially as the COVID-19 virus continues to circulate." Ahead, our experts share more about the logic behind spring cleaning and how to make the most of this time.

The benefits are both physical and emotional.

With spring comes longer days, which physically shine a light on the grime that has accumulated during winter. You start "noticing all the dust and smudges that have collected over the past year and feel inspired to get it all cleaned out to bring fresh energy," Kadi Dulude, the owner of  Wizard of Homes, a top-rated home cleaner on Yelp, says. And certain parts of your home really do need that refresh. Take your hardwood floors, "Deep cleaning your floors will extend their life," Telatnik shares. "By  removing dust, debris, and other elements of winter, deep cleaning will prevent scratches and damage to the wood finish, which likely means refinishing the floors less often."

Inevitably,  when your space looks good, you feel good, too. A recent Harris Poll survey, in partnership with Bona, found that people feel safer, productive, relieved, happy, and in control after cleaning and disinfecting their homes. Plus, eight out of 10 Americans felt more relaxed and enjoyed spending time in their spaces that much more.

Take a targeted approach.

"When considering what to prioritize in your spring cleaning and disinfecting routine, remember that any frequently touched surface should be considered high priority," Mckinney says. "Think light switches, doorknobs, handles, and sink faucets—all places where germs can linger for hours, or even days, and then travel from person to person." Once you've got your head wrapped around the most important areas to clean, Dulude says to carve out time and listen to your favorite music to make the process a fun one. Another tip? Round up go-to supplies. "Pick scents and materials that make you want to try them out on different surfaces," she explains. "Get a new mop, microfiber cloths, or organizing bins." She always recommends having other cleaners on hand to give your floors, countertops, and other most-touched surfaces the deepest clean possible.

From here, Dulude says to start on the top floor of your home with hard-to-reach items. "Things that are often overlooked during weekly cleans: tops of picture frames, ceiling fans, tops of high dressers and cabinets, and the insides of lighting fixtures," she explains. "But don't forget to clean under things, too. Take everything out from under the bed, give it all a clean, and put things back neatly (after mopping the floor, of course)." Take this approach in every space, like under your big kitchen appliances. If you'd rather enlist help to master this type of cleaning, you can also turn to an app or use a cleaning business tailored for the task.

Maximize your cleaning efforts.

Next, Dulude recommends these essential steps: deep clean your rugs, donate, toss or recycle any things you don't need, wipe down your knick-knacks, wash your throw pillows, blankets, and toys, and remove scuffs from your walls. Make sure to scrub your floors too. After this step, Telatnik says to let them dry, and then apply a coat of polish to refresh your finish. "A coat of polish can even out a floor's look, filling in any small scratches and adding a new protective layer on top of your floor," he said. "If the surface has larger areas of damage (worn patches, scratches, water spots, etc.), consider contacting a certified flooring contractor to determine the best approach."

"Additional steps that people often neglect, but should definitely tackle as part of their comprehensive spring cleaning and disinfecting routine, include vacuuming the mattress to reduce allergens and dust mites, emptying and disinfecting the shelves and drawers around the house, vacuuming the blower compartments of the A/C to prevent mold and mildew from venturing into your home, and cleaning the inside of the washing machine to help prevent bacteria buildup and laundry contamination adds Mckinney.


4 Simple Updates to Refresh the Home Office

  • By
  • Posted

Homeowners across the country have transformed their kitchens and living rooms into temporary workstations. But have they created an optimal setup for remote work? Kelsey Stuart, CEO of Bloomin’ Blinds, offers the following tips to make a home office more inviting and motivational.

woman on laptop with her cat

Give the walls a fresh coat of paint. Whether you have a designated home office or plan to repurpose a spare bedroom or basement, try a quick and fresh paint job to transform the room. Lighter tones reflect more light, helping to make a home office feel roomier. Try a light, simple color scheme in order to promote high energy and creativity. This will also provide a professional background for video conference calls. Need inspiration? Try these 2021 paint colors of the year from Benjamin-MooreBehrPantone, or Sherwin-Williams.

Good lighting is key. Lighting is critical to productivity and professionalism in the age of Zoom calls. There are two ways to control the lighting in a room: through natural light via windows and artificial light, using lamps and bulbs.

  • If you haven’t already, swap out existing lightbulbs for LED bulbs. Relatively inexpensive, LEDs are energy-efficient and help light up a room better than traditional bulbs. Eliminate shadows by adding lamps where needed.

  • Whether you’re trying to focus for an extended period of time or are about to log into a videoconference call, controlling the amount of natural light in the room impacts your productivity. You might find it helpful to rearrange your office based on natural light sources so that your eyes don’t get fatigued. Also, control the amount of light in the space by adding blinds, which give you the ability to direct the light in your office. You could also use shades with motorized units to make easier adjustments. Blinds also can have sun sensors that will lower shades if the window gets too hot, helping you to stay focused on your work.

Bring in the outdoors. A functional and beautiful add-on to your office space, plants have been shown to boost creativity while also creating a calm environment to work—all while filtering the air you breathe. Here are ideas for what plants to add.

Personalize your space. We’re all spending more time in our home office, so don’t forget to add the personal touches that remind you of why you go to work every day. For instance, photos of loved ones or a fun pattern on a floor rug can help you create a space that you’re happy to spend time in.


Courtesy Realtor Magazine

Source: By Kelsey Stuart, CEO of Bloomin’ Blinds  

Getting the Right Light

  • By
  • Posted

Choosing bulbs has gotten much more complicated as energy-saving technology becomes more common. Here’s how to make the smartest and most flattering choices for a home.

energy saving lightbulbs

By Al DeGenova

Selecting a beautiful new light fixture for a home is a great way to visually update a home and add sparkle to a space. But putting the wrong lightbulb in that fixture can have disastrous effects. The wrong lighting makes a room feel too dark or too bright. Light also affects the appearance of upholstery, paint, or artwork.

Comparing lighting options available today can be like comparing a Model T with a Prius because of the vast options—both old-school and new—on the market. With energy consciousness steadily rising, the expansion of federal legislation mandating lightbulb efficiency is now being reconsidered by the Department of Energy, and some states, including California, Nevada, and Washington, already have strict laws in place. The 60-watt tungsten bulb is, indeed, becoming a Model T.

Just as you can still find gas-guzzling cars, however, you can still purchase incandescent bulbs. However, you need to understand the terminology surrounding new light sources.

Lightbulb Types

LED, CFL, and halogen and tungsten incandescent: LED is the most energy-efficient and long-lasting; it’s also the most expensive. Tungsten incandescent bulbs are the least efficient and cheapest; 90% of the energy consumed by an incandescent bulb is lost as heat. CFLs contain mercury and must be disposed of properly.

Bulbs come in any number of shapes and sizes. When shopping, the most common lightbulb shape and size is described as an “A19 Medium Base.”

Brightness: Light output is measured in lumens, not watts as we previously used for brightness. In context, a 60-watt incandescent bulb provides roughly 800 lumens: 40W, 450 lumens; 75W, 1100 lumens; 100W, 1600 lumens; 150W, 2600 lumens.

Energy Used: The amount of electricity that a lightbulb consumes is measured in watts. A 60W tungsten bulb consumes 60W. An 800-lumen LED bulb (equivalent to the 60-watt tungsten) uses approximately 14W of electricity, a 75% reduction in energy consumption. Efficiency is often expressed as lumens per watt; the higher the LPM ratio, the more energy-efficient the bulb.

Light Appearance: We understand lightbulbs described as “warm white” or “bright white,” but these are subjective terms, meaning different things to different manufacturers. Light appearance refers to the “color” of the white light. Light color is represented in Kelvin, a temperature measurement. 2700K is roughly the equivalent of a tungsten bulb; 3000K roughly the equivalent of a halogen bulb; 4500K considered equivalent to daylight, and appears blueish.

2700K lighting is warm and cozy, great for living rooms and bedrooms. 3000K lighting is crisper and best used where functional light is important, as in a kitchen or bathroom. 4000K is great for the garage or laundry room. Make sure that the lamps and ceiling lights in a room have matching Kelvin ratings. Nothing’s worse for a room’s appearance than mismatched light color. A bedroom with 2700K lighting at the ceiling and 4000K in the nightstand lamp looks awkward and will create an imbalance in paint and fabric colors.

Dimming: Ever say, “let’s dim the lights” to create a little romance or watch a movie? When incandescent bulbs are dimmed, their color warms, meaning that it changes to look more like candlelight.

Look for the word “dimmable” as a feature on the lightbulb package or integrated LED fixture. Unlike incandescent lighting, not all LED or CFL lights can be dimmed. This is not a huge consideration for bulbs used in table or floor lamps, but ceiling lights, especially chandeliers, are often controlled by wall dimmer switches. Nondimmable LEDs may not react and CFLs may turn a greenish-blue color. So much for atmosphere.

Further, LEDs and CFLs rated as dimmable will not warm to look like candlelight. They will simply get less bright while giving off the same color. LEDs offer a technology called “warm dim” that mimics the dimming of incandescent bulbs. Search for warm dim LEDs that offer a color range of 3000K to 2200K or wider.

Color Rendering: You probably won’t see the color rendering index of a lightbulb on its package. But this measurement is important when illuminating artwork or when highlighting decor, such as fabrics or paint colors. Low CRI ratings make the colors in a room seem flat, while high CRI makes color snap.

Sunlight, with a CRI of 100, has the most accurate color rendering; halogen matches sunlight with 100 CRI, which is why galleries often use halogen lighting. Most LED bulbs are rated above 85 CRI, which is considered acceptable; CFLs are somewhat lower. However, LEDs are available at higher CRI levels when color rendering is critical.


Al DeGenova is a freelance writer and former marketing executive in the lighting industry based in the Chicago area.


9 Steps to Help Decide on Solar Energy for a Home

  • By
  • Posted

With federal tax breaks for solar panels ending in 2021, this could be time for your home energy independence. When it comes to deciding if an investment in solar will pay off, you have to do research and make smart decisions for your home and financial situation. 

solar energy panels on roof

By Brandon Doyle

3 Takeaways

  • You should make your home as energy efficient as possible before investing in a solar system so you don't pay for a bigger system than you need.

  • A solar system is an investment with a typical payback period of eight years. 

  • You should know the warranty terms of a solar system and who will maintain the system when there are inevitable issues.

Here are some steps to take along the way:

Step 1: Figure out the home’s solar potential.

To get an initial idea about a roof’s solar potential, you can enter the address at Google Project Sunroof or check out solar resource maps from the National Renewable Energy Laboratory. One common misconception is that solar panels only pay off in hot, sunny parts of the country. To test this idea, you should look around your yard. Are there trees and other green plants? Plants use the sun’s energy to grow their leaves, so they are a good indicator of solar energy in your yard. Solar panels actually perform more efficiently in cooler temperatures.

Step 2: See what the home’s utility bills tell you.

Are the annual utility bills high enough that a solar investment will pay off in a reasonable period of time? For most homeowners, a utility bill tells you one basic fact: monthly usage. But a high monthly electricity bill can be caused by many factors ranging from old appliances to inefficient HVAC systems to poor insulation. Make the home as energy efficient as possible before buying a solar system so you’re not paying for a bigger system than you need.

Step 3: Plan ahead.

Will you be living in the same house in the next decade? A solar system is a big investment with a typical payback period of eight years. If you plan to move in the next couple years, buying or leasing solar panels could be a money-losing decision. If you decide to move after leasing, you’ll need to buy the system, assume the lease, or pay the provider to terminate the lease altogether.

Step 4: Establish an accurate baseline.

A home energy monitor like Sense will track energy consumption both before and after solar is installed. Get a couple months of data and use that information to calculate how much of the current bill can be offset with solar and how big an installation is needed.

Step 5: Consider financing and payoffs.

Solar panels are an investment that needs to pay off financially. You should take your time analyzing whether buying or leasing will be most advantageous. If you decide to buy, most solar providers and websites like EnergySage will factor the 26% federal incentive into their estimates as well as any state incentives. Together, those incentives have a big impact on the final cost. If you need financing, you should talk with your bank, mortgage provider, or a lender, which offers solar-specific loans and resources. You should do the math to figure out how much you’ll need to invest and when that investment will pay off.

Loan and lease options are attractive because they can be cash-flow positive as soon as the solar panels are installed without a cash outlay in advance, but with a lease, customers don’t benefit from the federal tax credit. But you shouldn’t view leasing as a short-term decision since most loans and lease agreements are for longer than 10 years. The monthly lease prices of a solar system in the U.S. vary depending on how much energy a house requires and can produce. The higher the electricity bill, the higher the lease cost will be since it will demand higher solar productivity. To get an idea, Tesla calculates solar panel rentals based on the home’s address and electricity bill.

Step 6: Decide on storage or no storage.

Energy storage is still a premium option, but prices are dropping significantly every year. To help you decide if you need storage, consider two factors: when you use electricity and how frequently it’s interrupted. In areas with rolling brownouts or downed power lines from storms, solar storage can get you through without an interruption and batteries can store solar energy to use at night or on cloudy days. Do the math to figure out the payoff for storage.

Step 7: Make a short list of providers.

Once you've decided to install solar panels, you should research providers online and check their reviews. Identify three or four companies that look promising and ask for online quotes based on remote solar audits, then, narrow the candidates down to two or three installers. Their construction experts will visit the house to measure and assess the roof, conduct a shade analysis, and check to see if the electrical panel will need to be upgraded. Their final quote will reflect all those factors. When evaluating proposals, be sure it includes any costs to update the roof or remove trees that create shade.

Step 8: Ask more questions before deciding on a provider.

Once you have two or three final estimates based on in-person home assessments, you should ask the providers about how they’ll handle the installation. For instance, does the provider design and install the systems themselves, or do they subcontract to local companies? If the provider uses subcontractors, are the subcontractors licensed? Make sure the contractor can explain the components of the solar system they’re installing.

You should ask if they’ll file the necessary permits, including the electrical permit, building permit, and the dedicated solar photovoltaic permit. A reputable provider will help you file for rebates and tax incentives or do it for you. Make sure you know the warranty term and who will maintain the system when there are inevitable issues. And, finally, if you are leasing, you should ask the provider to disclose what the system is worth so you’ll have that information if you decide to sell your home.

Step 9: Patience required.

You should evaluate all the proposals to make sure they correctly address the home’s energy needs, then choose a provider you can trust. Once a contract is signed with a provider, the installation and permitting process can be surprisingly long as contractors file all the paperwork on your behalf with the utility and municipality. It can take a few weeks to get permits sorted out before the installer can get the solar panels on the roof.

When the system is installed and connected to the utility, it will start producing energy whenever the sun shines. You will save money on your utility bill while relying on clean energy that’s good for the planet.


Brandon Doyle, ABR, e-PRO, is a second-generation real estate pro with RE/MAX Results in the Twin Cities. He is also coauthor of the book M3—Mindset, Methods & Metrics: Winning as a Modern Real Estate Agent

How to Decorate a Living Room

  • By
  • Posted

Whether your style is traditional or modern, relaxed or formal, bold or subdued, your living room should be a place where you can feel comfortable, let down your guard and spend quality time with friends, family or just yourself. There’s an art to decorating a room that looks great and works well for you. 

Yanic Simard, designer for Toronto Interior Design Group offers tips and tricks for creating a comfortable space that reflects your style. Here are some of his favorites.

Living room with fireplace and chandelier

1. Mix Light and Dark

When a living room is all white and bright, it can feel too “clean” and unapproachable. When it’s all dark, it can feel like a cave. But mixing dark and light colors creates a dynamic look that has depth and balance. The design of any space benefits from the inclusion of at least a little white and a little black.

neutral colors couch rug in living room

2. Contrast Your Neutrals

Beyond including some white and some black, decorating a living room with a variety of contrasting neutrals goes a long way toward making it feel rich and welcoming. In this example, the white walls, caramel leather, brass hardware, gray sofa and blue-gray cabinets all contrast with one another, which highlights their different finishes and undertones. This makes the palette feel rich even before other key elements, such as color, pattern and texture, are added.

deocorating with textures

3. Play With Texture

Texture is easy to overlook when decorating a living room, especially since we don’t see it so much as touch it. But it’s important for making a living room feel cozy, and that goes for plush textures that appeal to the touch and harder textures that add contrast. Include leather, cotton, wool, metal, stone, glass, plant life and as many other textures as you can.

couch pillows coffee table

Pillows are a great place to start, especially if you’re decorating a living room on a budget. Look to other accessories and furnishings to add new materials to the palette, even in small doses.

 wooden wall wide screen tv

4. Work in Some Wood

We can’t talk about texture without talking about wood, one of the top materials for bringing a sense of warmth to a living room.

There are so many ways to add wood, any of which will make a space feel a bit more inviting. Consider wall paneling, side tables, movable stools, picture frames, sofa legs and carved pieces of art as just a few of the many options.

fireplace couch and coffee table

5. Mix Up Your Upholstery

Sure, most furniture stores give you the option of purchasing an entire living room set in matching upholstery, but that doesn’t mean you should do it. In a formal seating area, matching upholstery can give a sense of maturity and order, but if you want a living room to feel cozy and welcoming, mix and match your upholstered pieces to give the design a bit more personality.

light fixture sofa chair and coffee table

One of the safest ways to do this is to mix leather chairs with a fabric sofa or vice versa, so the materials contrast in an obviously intentional way. It gives the living room design some diversity, which can also give members of the family different options to suit their seating preferences.

6. Choose Practical Fabrics

Speaking of upholstery, it’s especially important for living room seating to be not only comfortable but durable. What this means will depend on your family. You may have babies or small children, pets or not, and they may be messy or tidy. In general, mid-tone fabrics are the safest bet, as very light or dark shades will readily show soil and wear.

Leather is a great material for avoiding stains because it can be easily wiped clean when a spill occurs. However, it’s usually more easily scratched than most fabrics, so it may not endure animals as well. A leather that already has a broken-in look or a pattern can age especially well.

See how to clean leather furniture

Denim and corduroy are two other materials that can be inviting yet durable. Plus, they add an unexpected twist compared with the typical plain cotton or wool upholstery you often see in stores. When choosing fabric for your living room furniture, look for a material with a blend of natural and synthetic fabrics to get the practical features of both, and if possible do a bend test of a fabric swatch to make sure the weave appears tight and doesn’t reveal the backing material. A tight weave will be more durable than a loose one (which leaves lots of space for dirt to hide), no matter the material.

7. Add a Dash of Color

While you can create a beautiful space without any vivid hues, adding even a little bit of color to a living room can go a long way toward creating a relaxed and inviting atmosphere.

When in doubt, look to a cheerful blue — it’s a hue that usually everyone can agree on. It perfectly contrasts warm elements such as leather and wood, and it feels just neutral enough to work with basically any other future accent colors.

8. Add a Patterned Rug

Pattern is a powerful design tool, infusing a living room with energy and minimizing the appearance of stains or wear. A patterned rug brings these benefits to the “fifth wall” — the floor — simultaneously anchoring a seating area and giving the whole room a sense of life. Even if you already have carpeting, consider adding a rug to your seating area. The first time you roll it up to go to the cleaners after a big spill, you’ll be glad you had it there.

9. Choose Movable Tables and Stools

Lightweight tables, stools, ottomans and even side chairs that can be moved around easily make a living room much more comfortable, giving you and your family lots of options on a daily basis for putting your feet up, setting a drink down or seating an extra guest. 

Use a few smaller pieces, such as the upholstered footstools seen here, to allow for movement of pieces closer to and farther from the main seating as needed.

10. Consider Conversational Distances

No matter how big your living room, there’s a limit to how large a seating group can be and still make sense for intimate conversation and cozy gatherings. A good distance between seats to facilitate conversation is about 8 feet, meaning if you have several sofas or a sofa and side chairs, the seating area should have a diameter of 8 feet, or 4 feet out from the center. 

A huge, 12-seat sectional sofa may look great and be perfect for a party, but if you’re looking to create a cozy living room, it’s usually best to use fewer, smaller seating pieces and push them a little closer together.

11. Don’t Take It Too Seriously

A living room is a great space to embrace thoughtful disorder, such as through an artistic gallery wall, mix-and-match throw pillows, open storage baskets and fun furniture like this tepee-inspired tent.

Trying for perfect order will mean that anything out of place will stick out like a sore thumb, whereas accepting a bit of controlled chaos will mean the occasional dropped toy or draped blanket will look right at home.

Styling in Place

  • By
  • Posted

The design trends that will dominate in 2021 reflect the ways the COVID-19 pandemic has upended people’s lives, driving them to create a home that’s a safe place to relax, work, study, and socialize. 

Outdoor pool and furniture

By Barbara Ballinger

While the following three enhancements address practical needs, there are plenty of high aesthetics—and a healthy dose of joy—in these new visions for the lives people are living indoors and outdoors. These are the kinds of upgrades that may just have people choosing to stay put, even when it’s safe to venture out more freely.

1. Two-for-one “Layered” Kitchens

layered kitchens and lighting

Even before the pandemic, some homeowners with an open floorplan found that increased exposure and family togetherness posed a downside in the kitchen work area: piles of dirty dishes, cluttered countertops, and other unsightly messes. Leave it to trendsetters to develop a solution for those with ample space and funds: two kitchens in one. Mick De Giulio of de Giulio Kitchen Design in Chicago calls it a “layered kitchen” with separate “work” and “living” zones. Cheryl Kees Clendenon of In Detail Interiors in Pensacola, Fla., refers to it as having a “prep and show kitchen.” In the work area, typically at the back and concealed by a door, wall, or hall, serious cooking and cleanup take place. The area may be part of a large laundry or utility room and might also be used by caterers (when entertaining returns with gusto), Clendenon says.

In contrast, the living or show kitchen at the front remains open, designed to display culinary creations in a clean, uncluttered way. It’s where a golden-brown turkey would come out of the oven before being carried to the back for carving. Some homeowners may also designate one kitchen for special-requirements cooking such as gluten-free prep, which a client of Clendenon’s requested. Or some may want to make space for a dedicated beverage center with a coffee station, refrigerated drawers, and a wine cooler to meet needs from morning to night, De Giulio says.

2. Flexible, Prefabricated Sheds

Outdoor Prefabricated Shed

Sheds, once used primarily to store sports equipment and garden paraphernalia, have evolved into a common home addition. Some homeowners use them as overflow storage instead of paying for an expensive off-site facility. Others seek larger and better outfitted models as accessory dwelling units for people because more municipalities are approving ADUs. They’ve become dwellings for returning adult children and short- and long-term renters, quiet work-from-home quarters, and escapes for recouping sanity—hence the new moniker “the sanity shed.”

Rather than have an architect or contractor design and build a shed from scratch—which can be pricey and time-consuming and which often requires a building permit—homeowners can find more affordable, off-the-shelf options on the market, some of which can be customized. Boulder, Colo.–based Studio Shed has experienced explosive growth during the pandemic. The company offers prefabricated, sustainable designs that vary by size (from 64 to 256 square feet), color, door and window placement, finishes, and price ($11,000 and up). Because of the increase in gardening during the pandemic, the company offers its “Studio Sprout” greenhouse ($14,250), while customers’ most popular choice is a functional home office (about $25,000). Some municipalities looking to spur affordable housing in a shorter time frame offer preapproved plans for expanded sheds that can serve as modest dwellings, says architect Brian O’Looney of Torti Gallas + Partners in Washington, D.C., in his new book, Increments of Neighborhood.

3. Outdoor Warming Features

outdoor fire pit and furniture

As temperatures fell, homeowners wanted to extend safe, outdoor socializing with family and friends in the time of COVID-19. “Everybody wanted to turn their backyard into an oasis to be able to eat safely and talk,” says landscape architect Clara Batchelor of CBA Landscape Architects in Cambridge, Mass. Many, including residents of multifamily buildings with shared outdoor space, want to keep doing so throughout winter. Two features that make fresh-air living in chilly evening weather pleasant are fire pits and patio heaters. They offer warmth from infrared electric heat, propane, or real wood-burning fires.

Local authorities are revising codes and ordinances to ease requirements pertaining to fire features, says architect Gary Kane with The Architectural Team in Chelsea, Mass. While fire pits have been popular for years, they’ve become more stylish, now available in different shapes, sizes, materials, weights, and prices. One design that grabbed attention early in the pandemic was Solo Stove’s portable “Bonfire” pit that uses logs but is smokeless. Hybrid models use gas and burning logs, says landscape architect Marc Nissim of Harmony Design in Westfield, N.J. Patio heaters are a newer home addition, inspired by restaurants using them to coax diners to eat outdoors. Using a variety of heating fuels, some are designed to stand alone and others mount on a wall or ceiling, says landscape designer Michael Glassman of Michael Glassman & Associates in Sacramento, Calif.

Barbara Ballinger is a freelance writer and the author of several books on real estate, architecture, and remodeling


Show Your Home a Little Love This Valentine's Day

  • By
  • Posted

Valentine's Day is a time to celebrate the ones we love, but this year, besides celebrating it with flowers, chocolates, and a candle-lit dinner, be sure to show your home a little love too.

By Christopher Kelly 

New Decorations

Adding some new decorative items, whether they’re temporary, like a bouquet of flowers on the dining room table, or more permanent, like a fresh coat of paint, are a great way to show your home a little love and help yourself fall in love with your home all over again. 

Clean Up

Get a head start on your spring cleaning by washing the windows, cleaning the carpets, and dusting the fans now. The fresh feeling you create is a great way to show your home some love.

Minor Renovations

Looking to save water? Consider a new showerhead. Want to upgrade the fixtures in your home? Consider something as simple as new outlet covers. Home renovations don’t have to be big and expensive; even small upgrades can have a big impact on your home.

Make Repairs

If you have a loose banister in the stairwell, need to replace caulk in your bathroom, or a light switch that doesn’t work, go ahead and repair it yourself or bring someone in to repair those items.


Christopher Kelly, RE/MAX Bayside


Improvements First-Time Homeowners Should Tackle First

  • By
  • Posted

While low mortgage rates and the COVID-19 pandemic continue to motivate first-time buyers, other factors need to figure into their financial planning. Tight inventory markets mean many home shoppers will end up purchasing a house that requires repairs to its structure and mechanical systems, which will take a big bite out of their budget.

By Barbara Ballinger

Owning a home is a significant financial investment. These 10 tips will help you prepare for maintenance and repair costs, too.

3 Takeaways: 

  • First-time buyers should look beyond the shiny new kitchen and consider problematic signs in a listing.

  • Chimney inspections can point out crumbling mortar and problems with flashings, flue liners, and the flue itself.

  • Homes without good gutters and downspouts may have problems with interior leaks.

First-time buyers may want to look beyond the shiny new kitchen and sizable outdoor space and consider problematic signs, such as a leaky roof, cracked pipes, or inefficient air leaks. A thorough home inspection is good a start, yet, some buyers are willing to waive the inspection to make their offer more appealing to sellers in today’s competitive market. Although, they should know the risks involved when purchasing without an inspection.

All too often, homeowners—especially those buying a fixer-upper—focus on aesthetics, like gleaming subway tiles they plan to install along a kitchen backsplash or how they’ll transform a yard into a mediation retreat. They can’t forget about the issues that must take priority. Houses age just as people do, and they require regular checkups, repairs, and new parts, akin to our doctor visits, medications, and surgeries.

“So many homeowners buy a house for a lifestyle rather than for economic reasons, so they tend to think about the glitzy stuff rather than what’s behind the walls and sometimes not visible,” says Jennifer Ames, a salesperson with Engel and Volkers' Chicago office.

While it’s less joyful to spend money on replacing a furnace or roof than updating an old bathroom or porch, it’s critical to do so to protect an investment. Due diligence can also help lower heating and cooling bills and pare down other costs. Homebuyers should have specialists perform ongoing maintenance and to not put off repairs that may become more expensive if left untended. Some might even lead to health issues, such as mold.

1. Keep away rain. Climate changes have brought heavy rains and storms to more parts of the country, and homes without good gutters and downspouts may have problems with interior leaks and standing water in the yard.

A home’s gutters should be pitched away from the house and be wide enough to carry water without leaves getting clogged—ideally 6 inches rather than the traditional 4 inches.

Downspouts should extend 5 feet from the home’s foundation so water won’t collect near the home and leak inside, potentially causing mold.

Gutters should be cleared annually or semi-annually. An expert should periodically check wood fascia boards behind gutters, which may rot over time. Also, installing a drip edge to the roof’s plywood decking to keep water from getting underneath. In addition, the landscape should be regraded if the yard slants downward toward the house.

2. Tighten the envelope. Homes that are not well sealed allow warm air to escape in winter and cool air in summer. It also makes it easier for bugs and rodents to find their way inside. Hire an expert to perform an assessment. The assessment provides a number that indicates how leaky a house is, and directs a homeowner to undertake changes, such as using caulk to seal around windows, air ducts, and areas where the walls meet the foundation. In addition to lowering energy costs, this also prevents pollutants and humidity from entering the home.

Historically, most homeowners who add insulation choose foam or mineral wool, but many building codes now require tighter envelopes, so the industry is moving toward blown-in rockwool, fiberglass, and cellulose.

Another way to keep out insects and rodents is to use inert pesticides like boric acid.

3. Maintain a stable foundation. Cracks in a foundation require prompt attention so they don’t spread and cause more severe problems. Cracks develop for all sorts of reasons, from climate fluctuations to age to land sloping toward the house. A structural engineer should be hired to do an assessment and help the homeowners develop a solution, such as waterproofing a basement and foundation down to the footings or installing a sump pump and battery backup system to remove future water. Telltale signs of a wet basement may be stains on walls or bad odors from moisture.  

4. Inspect the roof. Unless it’s a simple case of a roof missing a few shingles, a home’s topmost layer can become an expensive repair if it’s old or badly damaged. Buyers should ask sellers the age of the roof and how it was constructed. The best shingle roofs also have a good underlayment and decking underneath.

Flashing, a plumbing stack, chimneys, and skylights should also be inspected before purchase because rain, animals, and debris can find their way into openings. A metal roof will last longer—50 to 100 years versus a shingle roof’s 30 years—but its costs can be four times higher. Homeowners may find it useful to have an annual roof inspection to check for storm damage. Also, they should perform their own visual inspection by noting discoloration or curled or missing shingles.

5. Update lighting. Old incandescent lightbulbs increase energy costs and have a short life span. LEDs are an easy, affordable upgrade that require far fewer changes and are much more efficient. Choose LEDs with a 2,600 to 3,000 K (kelvin) measurement that produces a warm color, similar to 60-watt incandescent. Because LED bulbs come in a wide variety of shades, trying out one to see if it appeals before buying for an entire house. Also, avoiding compact fluorescent lights, which take time to warm up and can be overly bright, almost like a floodlight.

6. Add air conditioning. With much of the country experiencing more extreme heat, many new homeowners may find that fans aren’t sufficient to cool a home. Window AC units work, but don’t cool a house efficiently and are less visually appealing. A quality AC system will provide a good return on investment at resale.

A split system to lower energy costs since each room can be separately controlled. However, the costs are greater than one central system—sometimes 50 percent more—though they will help save money over time. Some companies recommend adding an ultraviolet light system to kill mold, bacteria, and viruses from being circulated, which many homeowners have started to do since the onset of the pandemic.

7. Prepare for outages. Many experts believe electricity outages will continue to be a problem in certain parts of the country. A generator is a wise investment, especially if outages grow longer and more frequent. Homeowners can still benefit from the federal solar tax credit if they invest in a solar-battery backup system.

A battery backup attached to a solar array could be connected to a single circuit to extend the life of the battery’s charge. On average, costs might run from $25,000 to $40,000. Less costly, but also less environmentally friendly, is a diesel generator system, which may run between $18,000 and $22,000 for a 3,000-square-foot home, or $5,000 to $8,000 for a smaller unit that powers kitchen appliances and some lights. Besides cost, it works for longer periods without needing to be recharged like a solar system.

8. Maintain wood. Wood adds charm to a home, whether through siding, flooring, railings, or a deck. But it also requires regular maintenance. Boards—even new ones—can rot due to weather and insects. Another culprit is the type of wood used today. A century ago, the center of trees was used for boards, which made them sturdier than today’s wood planks that are made from the entire tree and its pulp. That means they also carry more moisture, and therefore rot faster. Pressure washing a house to remove mold and sealing wood well with quality paint will reduce this.

9. Remember tree care. Trees are a beautiful addition to a property, providing shade in summer and picturesque snow-covered branches in winter. But they should not be overlooked by homeowners when it comes to their care. Big limbs may come down during storms, insects can feast on wood, and spreading tree roots may clog sewers. New homeowners should hire an arborist to examine their site’s trees when they move in and have limbs pruned periodically. Diseased trees should be promptly removed to prevent spread.

10. All things chimney. A stately chimney adds elegance to a home, the equivalent of icing on a cake. But if it’s not tended to, moisture can enter, along with animals and other debris. A cap will help, as will inspections to point out crumbling mortar and problems with flashings, flue liners, and the flue itself. Keeping all parts in shape will also improve the air quality in a house and allow smoke to exit more freely when the fireplace is used. If a chimney has significantly deteriorated, the home buyer will have to decide whether to take it down to the roof level and sheathe it over with shingles or to have it repaired. Another factor may be cost, which can vary greatly. A third factor may be if the house is located in a historic neighborhood and exterior parts must be retained according to a municipality’s rules.

Barbara Ballinger; Barbara is a freelance writer for REALTOR Magazine and the author of several books on real estate, architecture, and remodeling.

6 Common Causes of Clutter and Their Cures

  • By
  • Posted

If you have clutter in your home, you’re certainly not alone. Most of us hang on to unneeded things and struggle to keep our homes clutter-free. But if we could identify the root causes of the clutter, could we make it go away? Identifying the cause of clutter is definitely a great first step. Clutter may have one of several root causes. 

Life changes, decision avoidance and a lack of efficient systems can be contributing factors.

By Jeanne Taylor

1. Your Life Circumstances Have Changed

A change in life circumstances — a new baby or job, a move to a new home, an illness or injury — can be stressful and lead to a typically tidy home becoming cluttered. Eventually, this type of clutter resolves when the baby starts sleeping through the night or the moving boxes are unpacked. The question is how long adjusting will take and how much your clutter will bother you in the interim. 

If you’re frustrated by your chaos and you lack time or bandwidth to address it, you may want to seek help from family, friends or a professional home organizer to get you through this stressful phase. 

2. You Lack Habits for Keeping Your Home Tidy

Some people are not in the practice of hanging up their jackets or putting away their beauty supplies. Patterns like these can cause a state of disarray at home. But it’s not impossible to establish new habits. 

I recommend trying an approach called “the habit loop,” from the bestselling book The Power of Habit: Why We Do What We Do in Life and Business, by Charles Duhigg, which I outlined in this story. Essentially, it involves three steps: cue, routine and reward. The cue is a reminder that initiates a new behavior. The routine is the behavior itself. The reward is the benefit you get from doing the new behavior. It’s a method that has worked well for me as well as for some of my organizing clients.

3. You Lack Systems for Handling Your Stuff

Not having systems in place to handle items we touch every day can lead to a lot of clutter buildup. Here are a few of the big culprits.

  • Paper and mail are the No. 1 source of clutter in many homes. If you’re unsure how long to keep old bank statements, bills, tax returns and other records, or if you lack an efficient system for handling pending paperwork such as unpaid bills, the mess tends to mount. The good news is that you can take some simple, straightforward steps to address your paper pile and create a system for sorting mail. If you need help sorting the old items and setting up a new system, I recommend scheduling an appointment with a professional home organizer.

  • Cellphones, keys, glasses, wallets and laptops. Lacking a designated location to store these items can lead not only to clutter but to endless frustration. The solution is to simply designate a location so that you don’t have to search for these items every time you leave the house. A kitchen drawer with a charging station is ideal, but if you don’t have one, then simply corral these items in a small basket near an electrical outlet where you can easily grab them when you leave the house.

  • Purses, computer bags, backpacks, sports bags and outerwear. Closets and coat racks can fill up quickly with these bulky items, with extras ending up on the backs of chairs or draped over bannisters. Often, there are just too many of these items, so consider winnowing your collection. For example, if your child receives a new backpack each year, consider donating the old one. Sort through coats and donate any that no longer fit or you no longer use. Hang everyday bags and outerwear on a coat rack or in a closet near the front door. Store ski jackets and special-occasion purses in a different location.

  • Children’s art supplies, toys and homework. Children generate a large amount of clutter, with the most intense period of disarray beginning in babyhood and continuing through elementary school. Taming this mess can be challenging for even the most organized person — especially when it comes to toys that pile up as friends and family members offer gifts. If your child will agree, consider donating some toys to a charity to cut down on the mess.

As for the rest of children’s belongings, because young children like to be near their parents, you’d be wise to set up storage in or near the spaces where the family is most likely to spend time. Typically, this is the kitchen or great room.

4. You Own Too Many Items Used for the Same Purpose

I commonly help clients who have collected an overabundance of pens, pencils, reusable grocery bags, notepads, serving bowls and platters, kitchen tools, sunscreen, binders and coffee mugs. Fortunately, this is a relatively straightforward decluttering challenge. Simply reduce your collection of these items to an amount that will reasonably fit into your storage space and that you will realistically be able to use. Going forward, consider what you already own before buying. Be realistic about whether you have room to store a new item.

5. You Avoid Making Decisions About Your Things

Some people avoid deciding what to do with their clutter by placing items in a basement, garage or closet not visible from the main living spaces. This is a common tactic when quickly cleaning up before a party. However, this type of clutter weighs on people’s minds because they know it has to be dealt with sometime.

I often work with clients to sort through boxes and bags of stashed belongings that have been left in place for years. Usually the contents end up in the recycling bin or the landfill. If you know you have such boxes lurking, consider enlisting the help of a friend or a professional to help you sort through them and get them out of your life.

6. Your Health Gets in the Way 

A long-term health problem can sometimes result in household clutter as schedules are upset by medical appointments and free time becomes scarce. In these circumstances, a person may lack energy or mobility. Similarly, clutter can accumulate as we age and lose energy, balance or mental capacity for making decisions.

In such cases, it may be necessary to get outside help. A family member might need to attend to the clutter once a week. A professional organizer may need to create systems to more easily keep the home tidy.

On the other hand, extreme clutter or hoarding is usually caused by underlying issues that may require the help of a psychologist or other professional.

For most of us, clutter is simply a part of modern life. If you struggle with it, you’re certainly not alone. But take heart: With determination and a little help — whether moral support from friends or the guidance of a professional — you can overcome it and live a more organized life.

Jeanne Taylor, Houzz Contributor, is a home organizer in the San Francisco Bay Area.

Shhhh! When a Home Is Too Loud

  • By
  • Posted

The ability to work from home during the pandemic has been a blessing for many people, but it’s also made some acutely aware of the absence of one element helpful for productivity: quiet.

By Melissa Dittmann Tracey

With many people working or studying remotely, these strategies may help cut down the noise.

Many have taken to barricading themselves in closets or hiding in their cars to insulate themselves from chatty household members or noisy street sounds. Echo-prone open floor plans have exacerbated the problem as family members concurrently try to do their jobs or attend remote school.

Enter acoustic consultants, armed with sound- proof design techniques and technology to bring some peace and quiet to home environments. Real estate pros can benefit from learning about these enhancements, which can be a valuable amenity for resale, especially for a home on a busy street.

“The pandemic has forced people to look at their home’s acoustics very differently,” says Bonnie Schnitta, founder and CEO of SoundSense, an acoustic consulting company based in Wainscott, N.Y.

Since the start of the pandemic, Schnitta’s firm has been fielding more calls from real estate professionals and homeowners about noisy plumbing, loud traffic, and household sounds amplified by open floor plans. During site visits, they’ll calculate precisely how sound reverberates in a space and offer a range of solutions, such as adding sound-absorbing fabric or foam behind wall hangings or underneath rugs. While these fixes aren’t cheap—consultation fees start at $900—many find the results are worth it.

Real estate professionals are getting help for listings with challenging acoustics. For one hard-to-sell home on a noisy street, Schnitta suggested adding a water feature in the front yard swimming pool, which, combined with a barrier, masked the road noise. The home sold two weeks later. “You can rarely completely erase road noise, but there are ways you can mitigate it,” she says.

Noise can impact resale. A 2017 realtor.com® study showed that sellers of homes within a 2-mile radius of an airport tended to see discounted prices of 13.2% compared to similar homes elsewhere in the same ZIP code. Sellers near train tracks saw average discounts of 12.3%, followed by 11.3% for nearby noisy highways.

The luxury Mozaic at Union Station Apartments in downtown Los Angeles addressed street noise issues by teaming with Veneklasen Associates, an acoustics firm, to work on soundproofing. Because 90% of outside noise entering an apartment comes through windows, behind the existing double-pane windows, they installed secondary, noise-mitigating windows that dampen sound vibrations and prevent sound leaks using recording studio-style soundproofing technology.

Window add-ons from Soundproof Windows Inc. cost $790 to $1,070 apiece, while a sliding glass door insert sells for about $1,600.

Noise reduction can be as simple as adding a $50 door seal or as complex as spending $10,000 or more for full-home soundproofing. Here’s a range of recommendations from acoustic consultants:

  • Cover hard surfaces. Hard, highly reflective surfaces are among the worst sound offenders. Use softer materials, such as area rugs with a sound-absorbing pad underneath and fabric-covered furniture, suggests Audimute, an acoustic design consultation firm.

  • Reduce echoes in open spaces. In open floor plans, sound can bounce everywhere. SoundSense and Audimute offer fabric-covered panels to add onto walls for sound absorption. Or try bookcases—even just half-full—against walls to help absorb sounds. Artwork can also be used as a sound barrier. SoundSense makes a Paradise Foam product, which can be tucked behind canvased art to mitigate noise.

  • Seal doors and windows. Soundproofing companies offer acoustic door seal kits that fit snugly around doors or window edges to reduce sound coming through cracks.

  • Add sound-absorbing shades or drapes. Roman shades, using heavy fabric, can help reduce noise, as can cellular shades and plantation shutters. Heavy drapes and curtains—think suede or velvet—are also effective at absorbing outside noise.

  • Go green. In addition to improving air quality, houseplants can help reduce noise. (They’re most beneficial on hard-surface floors.) Consider a tall, potted Norfolk pine in room corners, Schnitta says. Sound will bounce from the wall onto the foliage instead of throughout the room.

“When [buyers] walk into a home and hear an echo, it can be a turnoff,” Schnitta says. In a listing, “there are several inexpensive things you can do: Put in an area rug with a specialized pad. Put a plant in the corner, even if it’s artificial. Add a bookcase. All of this can make a big difference when it comes to sound.”


Melissa Dittmann Tracey is a contributing editor for REALTOR® Magazine. 

Lumber Takes a Fall

  • By
  • Posted

Builders and home buyers paid the price as supplies dropped, but the outlook for new construction is improving.

Key takeaways:

  • COVID-19 dramatically disrupted the lumber supply chain affecting home building.

  • Lumber prices have been highly volatile since the spring.

  • An uptick in home remodeling has further squeezed the lumber market and contributed to rising prices.


By Daniel Bortz

Last spring, the coronavirus pandemic ground several large lumber mills in the U.S. to a halt—and homebuilders suffered the consequences.

Take Jesse Fowler, for example. Fowler, the president of Tellus Design + Build, a full-service general contractor based in Southern California, said in an interview with REALTOR® Magazine in November that lumber prices for his company had “gone through the roof.” “It’s tough on our business because we have to play the middleman and negotiate lumber prices for our clients,” Fowler said. In one instance, he said, a framer charged one of his clients who was building a new home $90,000 over what was originally estimated to compensate for rising lumber costs.

The COVID-19 crisis and the constraints it has put on the nation’s lumber production aren’t the only factors that have jacked up lumber prices. “Our lumber tariffs with Canada are high, and our domestic lumber industry can’t supply everything that we need,” says Robert Dietz, chief economist at the National Association of Home Builders.

In addition, “the wildfires in the West certainly haven’t helped [lumber production],” says Mike Theunissen, co-owner of Howling Hammer Builders, a custom home builder and remodeler based in Mt. Pleasant, Mich., and chairman of the building materials subcommittee at the NAHB.

Dietz says small homebuilders have had a harder time coping with the price hikes. “Larger builders are feeling less of an impact,” he says.

And optimism is on the rise more broadly. After reaching their peak last September, lumber prices began to fall, according to Monthly Composite Prices reports from industry tracker Random Lengths. “What we had was a shock to the supply system at the start of the pandemic, but now that lumber production has ramped back up, lumber prices have gone back down,” says Mark Rasmussen, a forest economist at Mason, Bruce & Girard, a natural-resources consulting firm, during an interview in early November. Yet just a few weeks later, prices were on the rise again, in response to both favorable building conditions in the fall and suppliers stockpiling materials for an expected busy construction year ahead.

Another bright spot for general contractors: “The remodeling business is busy right now, and you don’t need as many materials when remodeling” as you need to build a new home, Theunissen says.

However, with Americans spending a lot more time at home, many people are taking on home improvement projects themselves. As of mid-August, 61% of U.S. homeowners said they’d taken on a home improvement project since March 1, a NerdWallet survey found. Shawn Church, editor of Random Lengths, says the do-it-yourself remodeling boom contributed to rising lumber prices. “The strong DIY activity generated a demand for wood products that left supply and demand in an acute imbalance,” he says. “Wood products prices surged as a result.”

When lumber costs surged, Theunissen says, his company was forced to make some changes. “We started putting escalation clauses into our contracts for lumber,” he says. “For example, a contract might say that if lumber costs rise by more than 10% before our work is performed, then the customer must pay the difference... We hate to invoke escalation clauses, but there’s only so much we can absorb,” he adds. Howling Hammer’s contracts also started allowing for delays in materials delivery. “If it takes an extra four weeks to do a project because materials arrive later than we expected, then that’s just the way it is,” Theunissen says.

The Impact on New-Home Buyers

Of course, rising lumber prices also affect buyers purchasing new homes. Sales prices of new homes have risen sharply over the past year. As of mid-October, higher lumber prices had added $15,800 on average to the price of a new single-family home, Dietz says. According to Census Bureau data, the average sales price of new single-family houses sold in September 2020 was $403,900, up from $384,000 in January.

Homebuilders are grappling with a number of other challenges, Dietz says, most notably labor shortages and tighter mortgage lending requirements for home buyers and homeowners seeking home equity loans or lines of credit.

There’s little evidence that higher prices have kept large numbers of buyers away. Among affluent buyers, the demand for new construction remains high. Hans Wydler, an associate broker at Compass who works with buyers and builders of custom homes in the greater Washington, D.C., area, says, “Buyers [here] don’t care about lumber prices... That’s just not on their radar.”

Some buyers are being priced out, though. “I have a build job going on right now where the cost went up $50K due to the sudden increases in lumber and other building materials,” says Sheila Smith, an agent with RE/MAX Capital City in Boise, Idaho. “Boise is still being flooded with newcomers from bigger metropolitan areas, mostly California. They can afford the higher-priced homes, and our inventory is down 80% from 2019 overall.”

On a national level, housing starts hit a seasonally adjusted annual rate of 1.53 million last October, up 14.2% from October 2019, according to the Census Bureau. Moreover, homebuilder optimism in November hit its third straight record high, according to the NAHB/Wells Fargo Housing Market Index, which has been tracking homebuilder sentiment for 35 years.

Possible Solutions

Although future lumber prices can be difficult to predict, experts say a couple of actions may be able to curb lumber costs in the U.S. For one, “we need to find ways for the domestic lumber industry to produce more, perhaps through recruiting more workers or through new forest policy,” Dietz says.

Second, the U.S. government must negotiate a better lumber agreement with Canada to address the high lumber tariffs that are currently in place. “That’s been a longstanding issue,” says Dietz, “but I think it can happen sometime in the next two years.”

Lawrence Yun, NAR’s chief economist, sees reason for optimism. “Lumber prices should moderate and decline somewhat in 2021 as a result of more harvesting and a possible reduction in tariffs to foreign products,” he says. “That will help home building and generate local economic growth.”


By Daniel Bortz: Daniel is a freelance writer who specializes in writing about personal finance but also covers real estate, home improvement, travel, careers, small business, and even weddings.

1-20 of 66 Posts

Get in touch!

Do not fill in this field:

I agree to receive marketing and customer service calls and text messages from Melanson Real Estate. To opt out, you can reply 'stop' at any time or click the unsubscribe link in the emails. Consent is not a condition of purchase. Msg/data rates may apply. Msg frequency varies. Privacy Policy.

This site is protected by reCAPTCHA and the Google Privacy Policy and Terms of Service apply.